
DeepSeek Harness is DeepSeek’s open-source framework for turning an AI model into a working agent — it gives any AI model an environment, tools, memory/sessions, file and shell access, web search, sub-agents, scheduling, sandboxes, and other capabilities needed to perform multi-step tasks.
In this article, we'll show you step by step how to run DeepSeek Harness locally with Atomic Chat as the inference provider. The complete route will look like this:
DeepSeek Harness → http://127.0.0.1:1337/v1 → Atomic Chat → local AI model
What is DeepSeek Harness?
DeepSeek Harness is an open-source agent harness from DeepSeek. It includes:
- A browser-based interface
- A configurable agent loop
- A plugin system
- Permission controls
- Model providers
- Reusable agent presets
- Agentic tools like web search and scheduling
Its main design idea is that everything is a plugin — you can swap or combine models, tools, storage, interfaces, and agent behaviors. It also keeps detailed execution logs so agent runs can be inspected, resumed, forked, or replayed. At the time of writing, it's in developer preview and is built on DeepSeek’s Cordis plugin architecture.
The version tested for this guide was @deepseek-ai/dsh0.1.1-rc.2. Do note that while the package is in preview, the interface and configuration may change.
Prerequisites
Before you start, you'll need:
- A macOS, Windows, or Linux computer capable of running a local model.
- Atomic Chat installed on your desktop.
- Node.js. We tested with Node
v22.23.1. - An internet connection for the initial Atomic Chat, model, and npm package downloads.
- A local project directory for the Harness to inspect.
- Enough free RAM for both the model weights and its context cache.
Step 1: Install Atomic Chat
For the purpose of this guide, we'll be using Atomic Chat, an open-source local AI app we've built, as the inference provider — it will be used to download, install, and run a Qwen model that we'll connect with DeepSeek.
You can use any inference provider with DeepSeek Harness, so if you prefer to use Ollama, LM Studio, llama.cpp, or another app, skip this step.
If you'd like to follow along with us:
Go to atomic.chat and select Download. Choose the desktop build for your operating system, install it, and open the application.
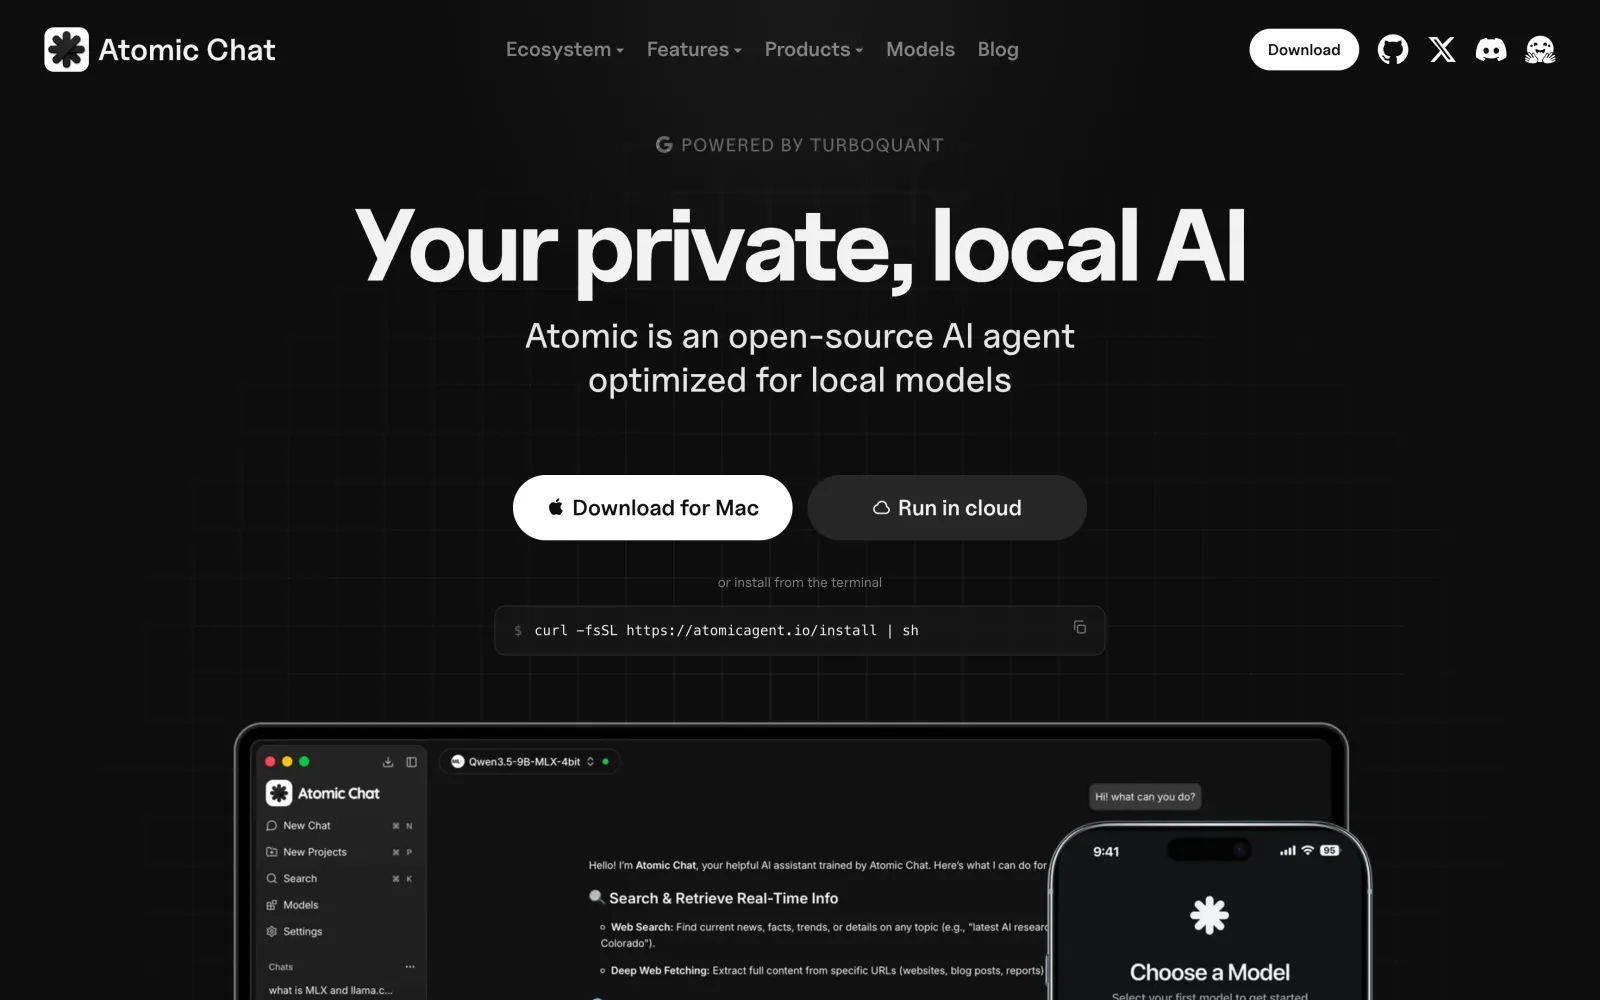
You need the desktop app for this setup. A mobile client cannot host the local model server or launch a coding agent against a project on your computer.
Step 2: Download a tool-capable local model
In Atomic Chat:
- Open Models in the sidebar.
- Search or browse for a model that lists Tool Use under Capabilities.
- Open the model card.
- Select Download Options.
- Choose a quantization that leaves enough memory for the context cache and the rest of your system.
- Select Download and wait for the model file to finish downloading.
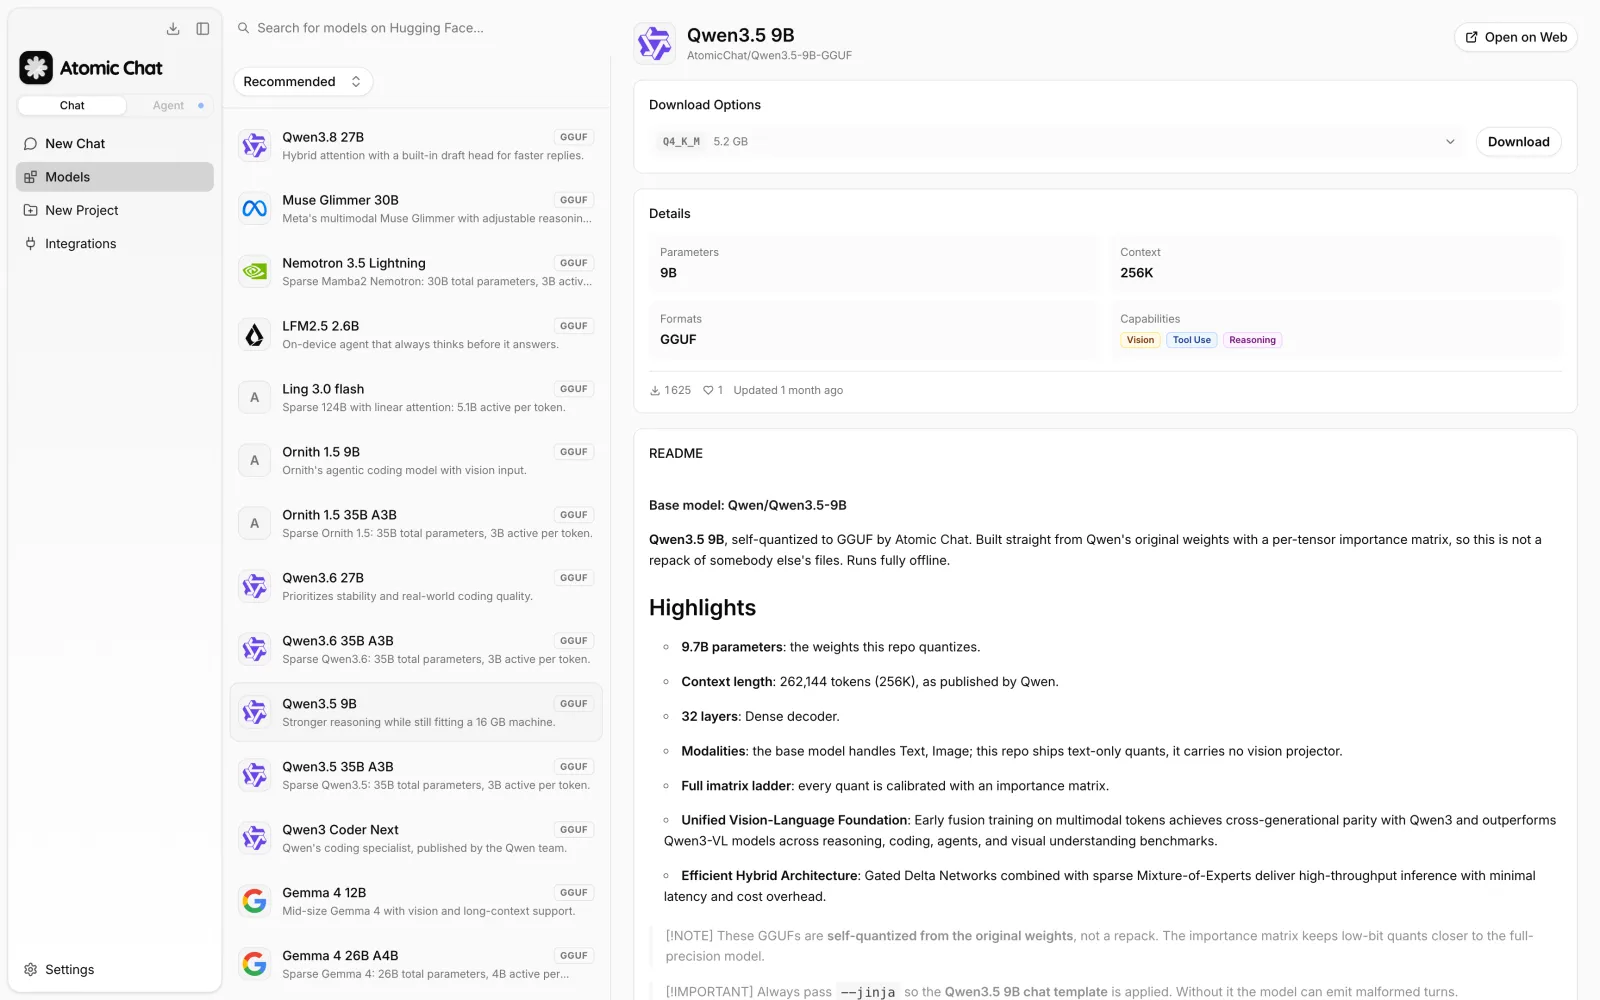
To work with a coding agent, the model must be able to produce structured tool calls so the Harness can read files, invoke the shell, and process the results — look for models that support tool calling.
Under Download Options, Atomic Chat lists the available GGUF quantizations and their file sizes.
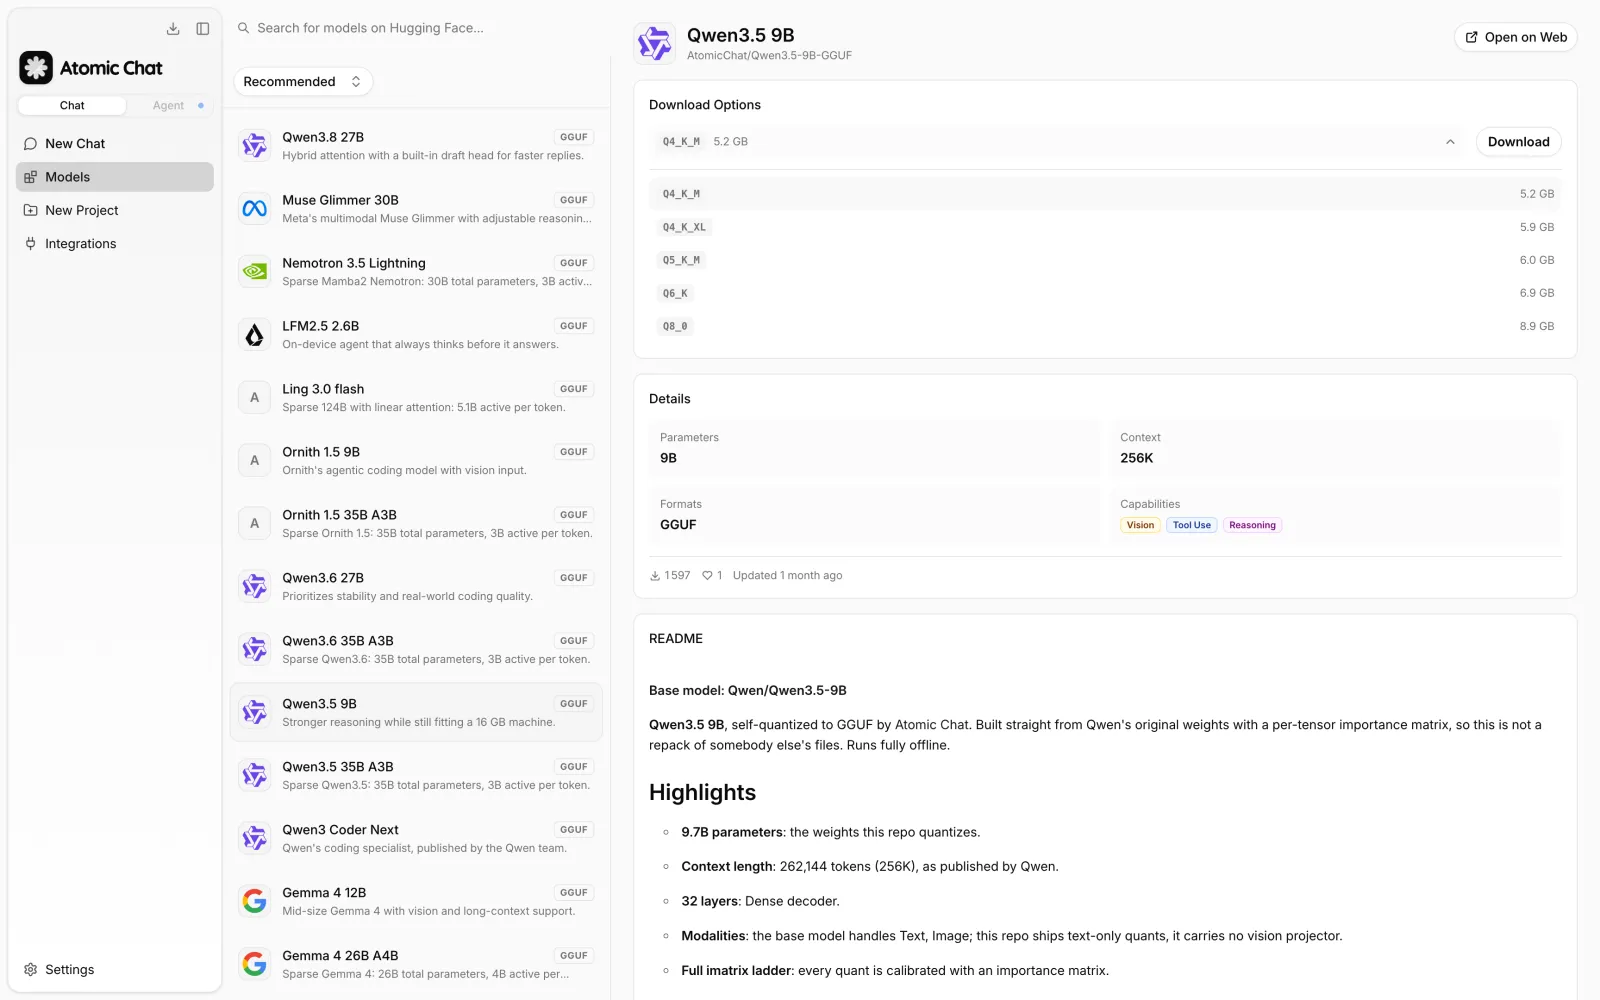
Choose a model and quant that leaves enough RAM or VRAM for system processes. For example, on a 16 GB machine, a smaller 4B model can be much faster than a 9B model that forces part of its weights or cache into swap.
Step 3: Start the Atomic Chat Local API Server
Open Integrations in Atomic Chat. The Local API Server panel exposes the active model through an OpenAI-compatible endpoint. In the default configuration, the endpoint is:
http://127.0.0.1:1337/v1
Load the model you downloaded and start the server.
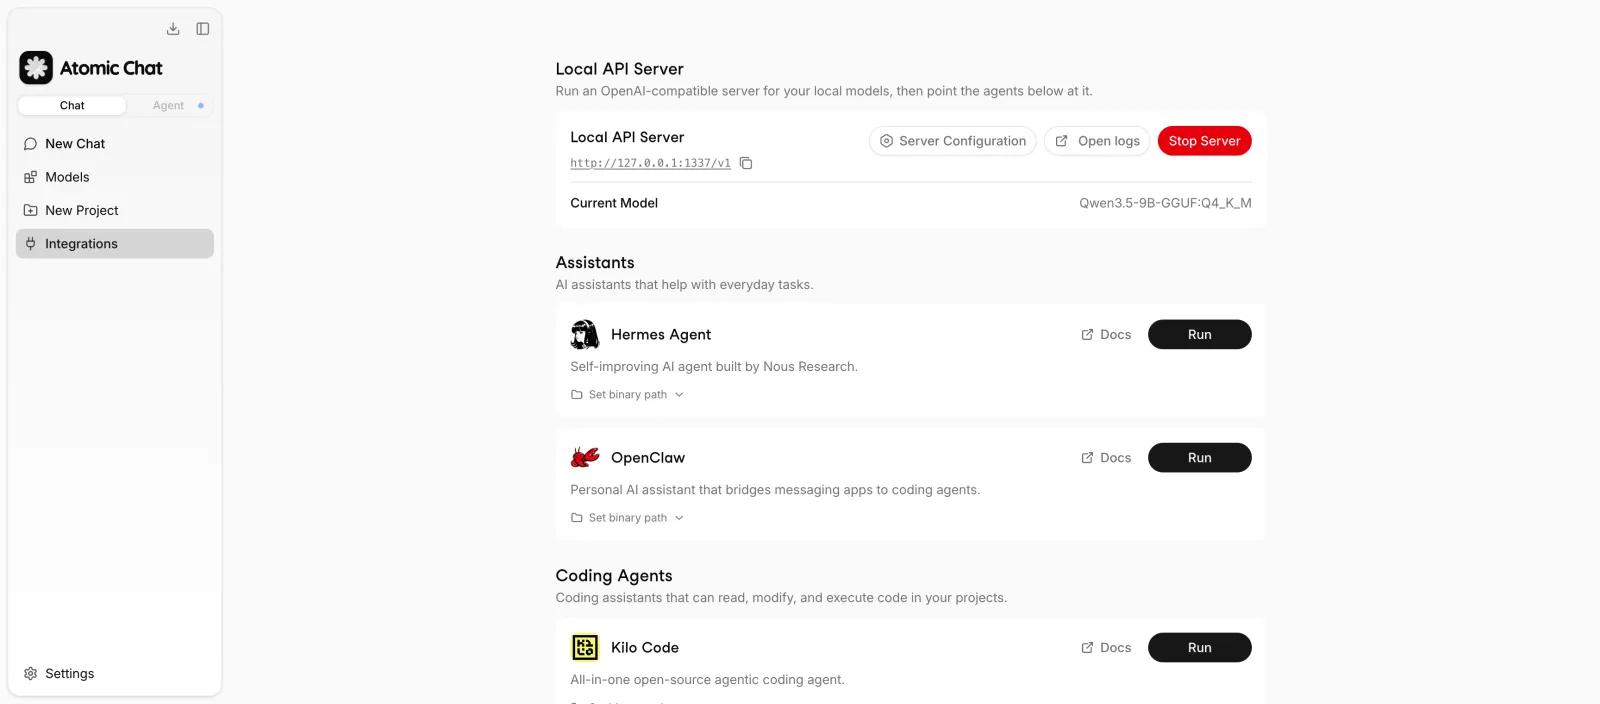
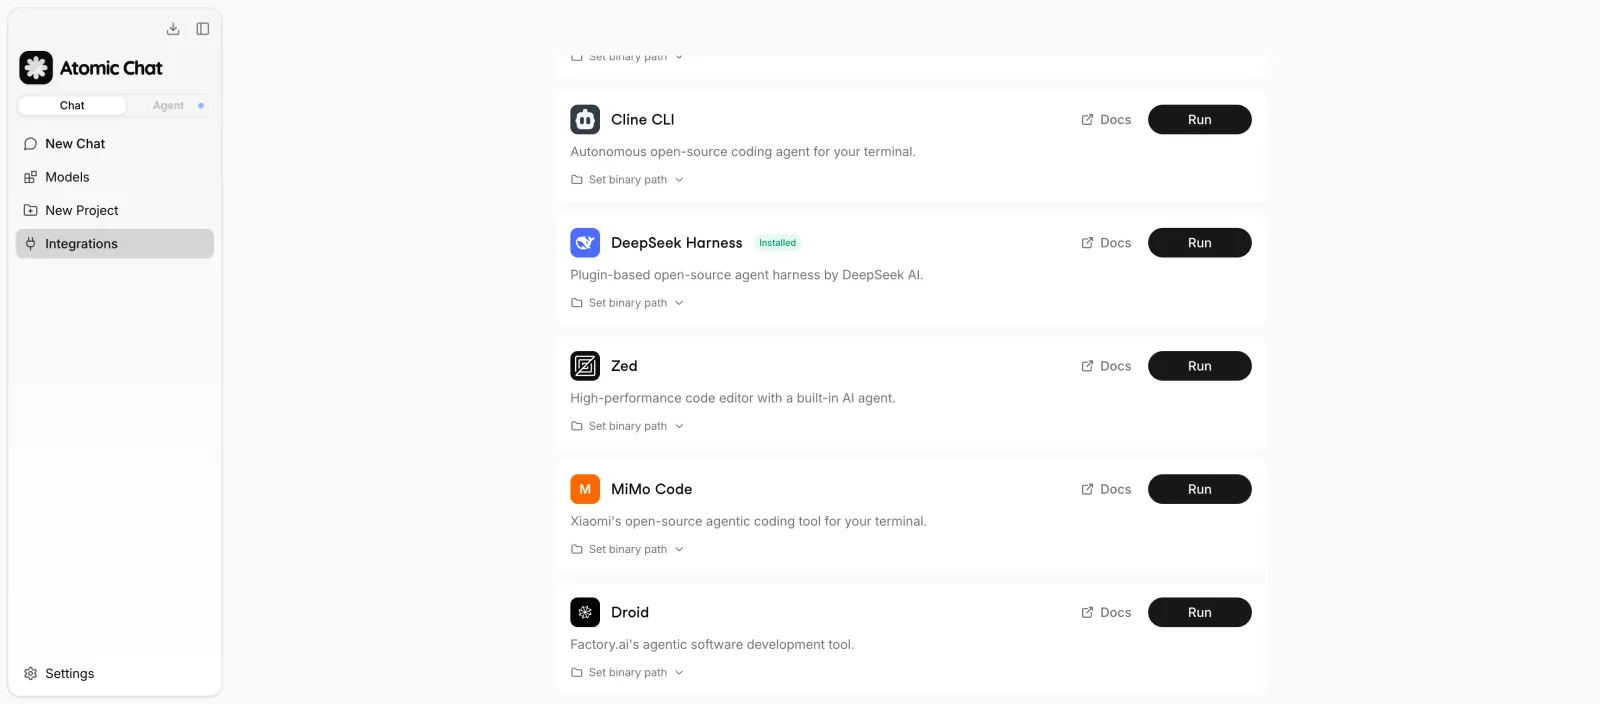
The Coding Agents section includes a DeepSeek Harness card with Docs and Run controls.
Atomic Chat can detect the dsh executable on your PATH, write the local provider configuration, and launch the Harness. You can also follow the manual setup below, which makes every connection value visible.
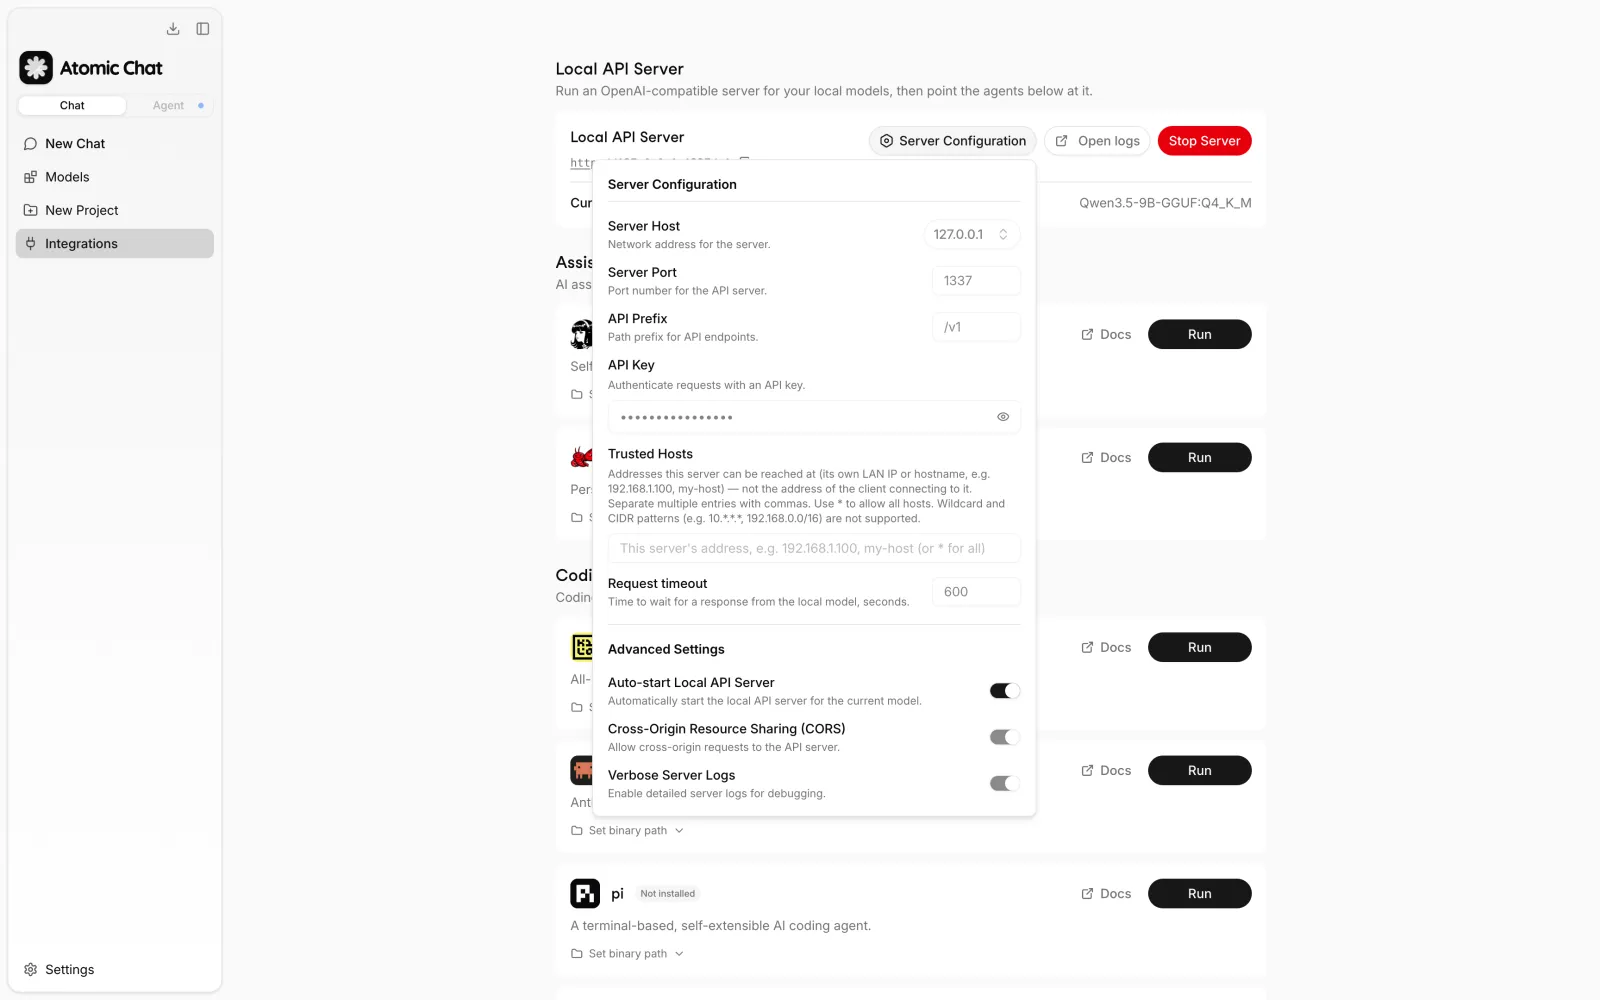
Before continuing, open Server Configuration and set an API key. In this case, this API key can be anything as long as it's the same between Atomic Chat and DeepSeek Harness. It is simply a shared password that Atomic Chat will use to authenticate requests from the Harness.
To generate a random key on macOS or Linux, run:
openssl rand -hex 32
On Windows PowerShell, run:
([guid]::NewGuid()).ToString("N")Copy the generated value, paste it into the API Key field in Atomic Chat, and save the server configuration. In Step 5, paste the exact same value into the custom provider's API key field in DeepSeek Harness.
If the server remains bound to the default loopback address, 127.0.0.1, a simple value such as atomic-local also works.
But don't leave the field empty: DeepSeek Harness saves an empty provider configuration but rejects the first request.
The rest of the default server configuration is:
| Setting | Value |
|---|---|
| Server Host | 127.0.0.1 |
| Server Port | 1337 |
| API Prefix | /v1 |
| Request timeout | 600 seconds |
Step 4: Start DeepSeek Harness
Open a terminal and move to the project you want the agent to use. The directory from which you start the Harness becomes its default filesystem location.
Check that Node.js is installed, then start the web interface:
node --version
npx @deepseek-ai/dsh web
On the first run, npx downloads the package and roughly sixty scoped dependencies. Wait for the command to display the local URL:
dsh web: http://127.0.0.1:3080
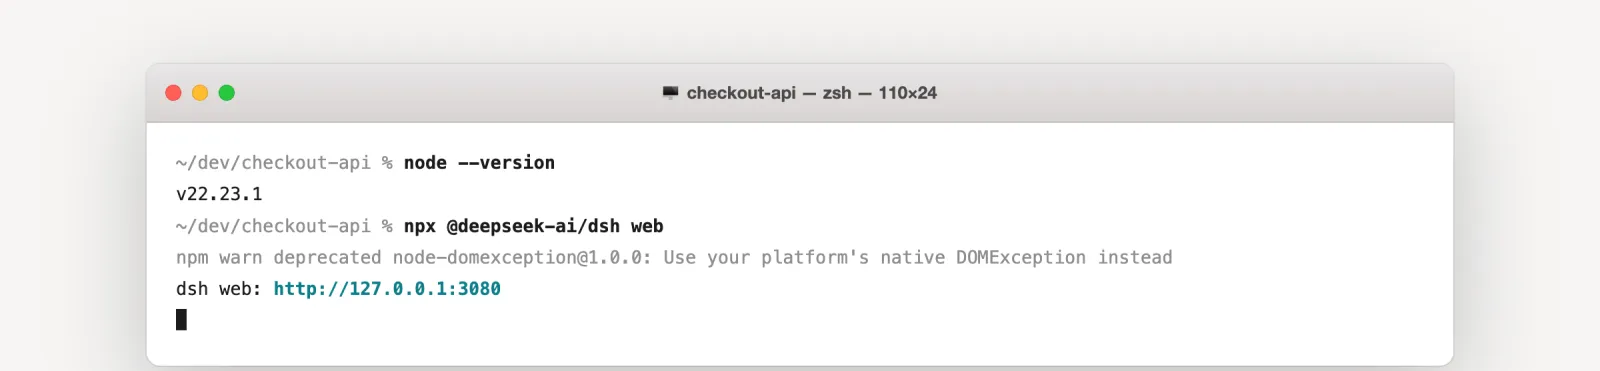
The command opens the Harness in your browser. To prevent it from opening a browser automatically, add --no-open.
Because this version is a developer preview, the first launch shows a preview notice.
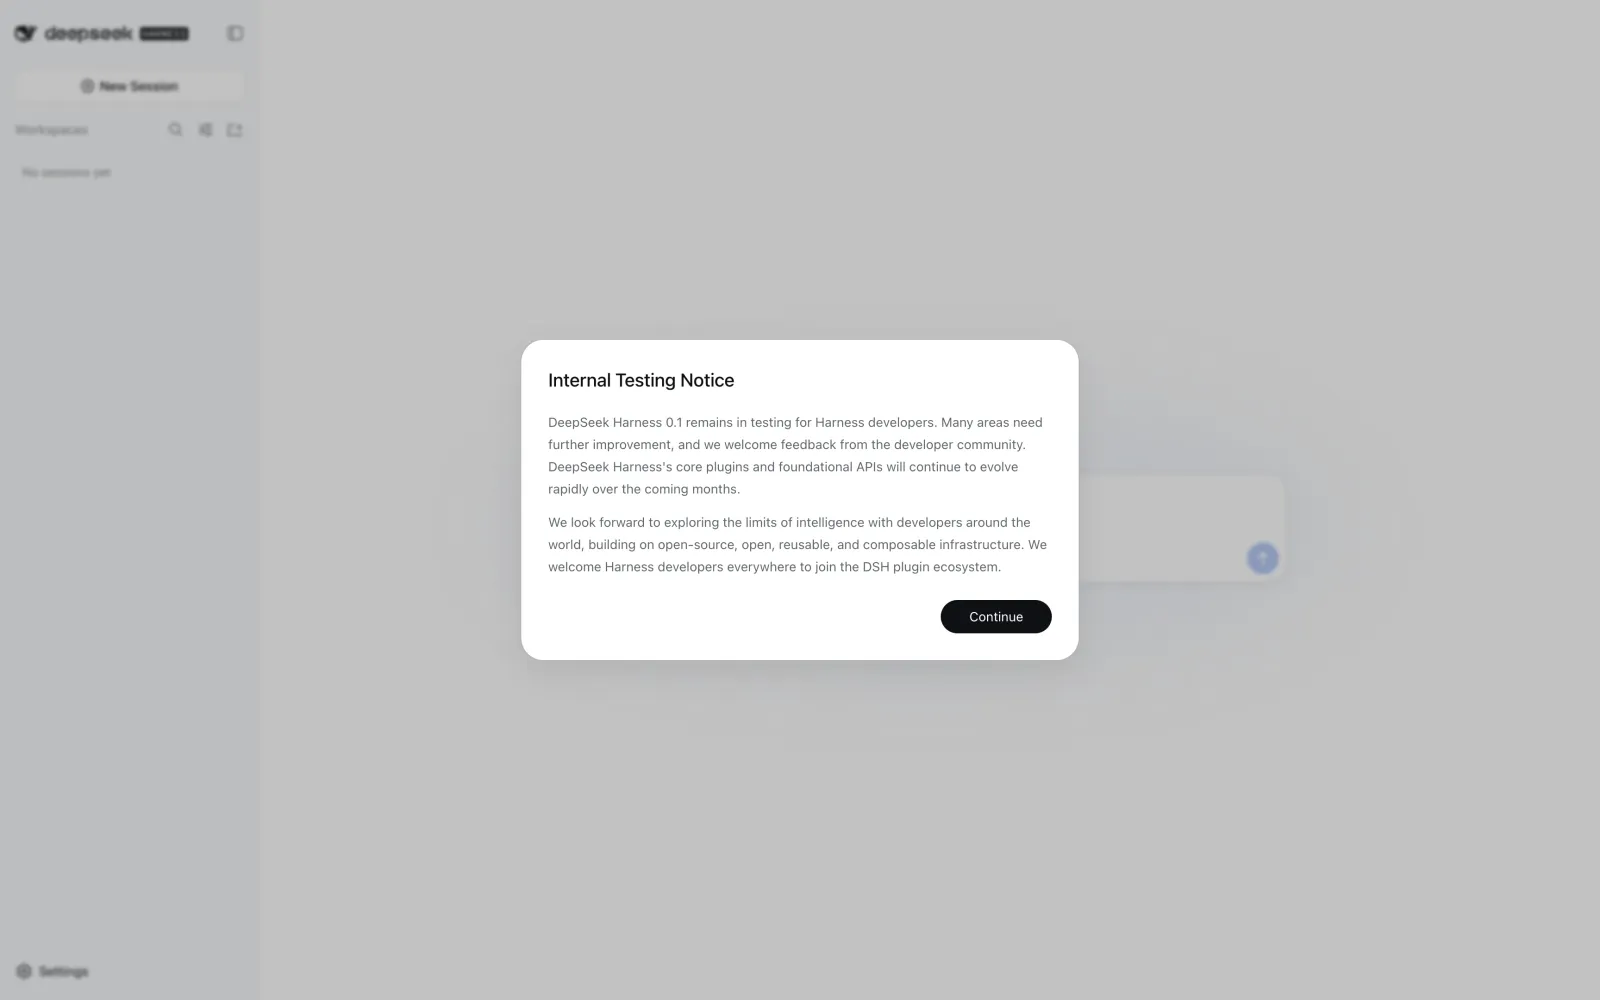
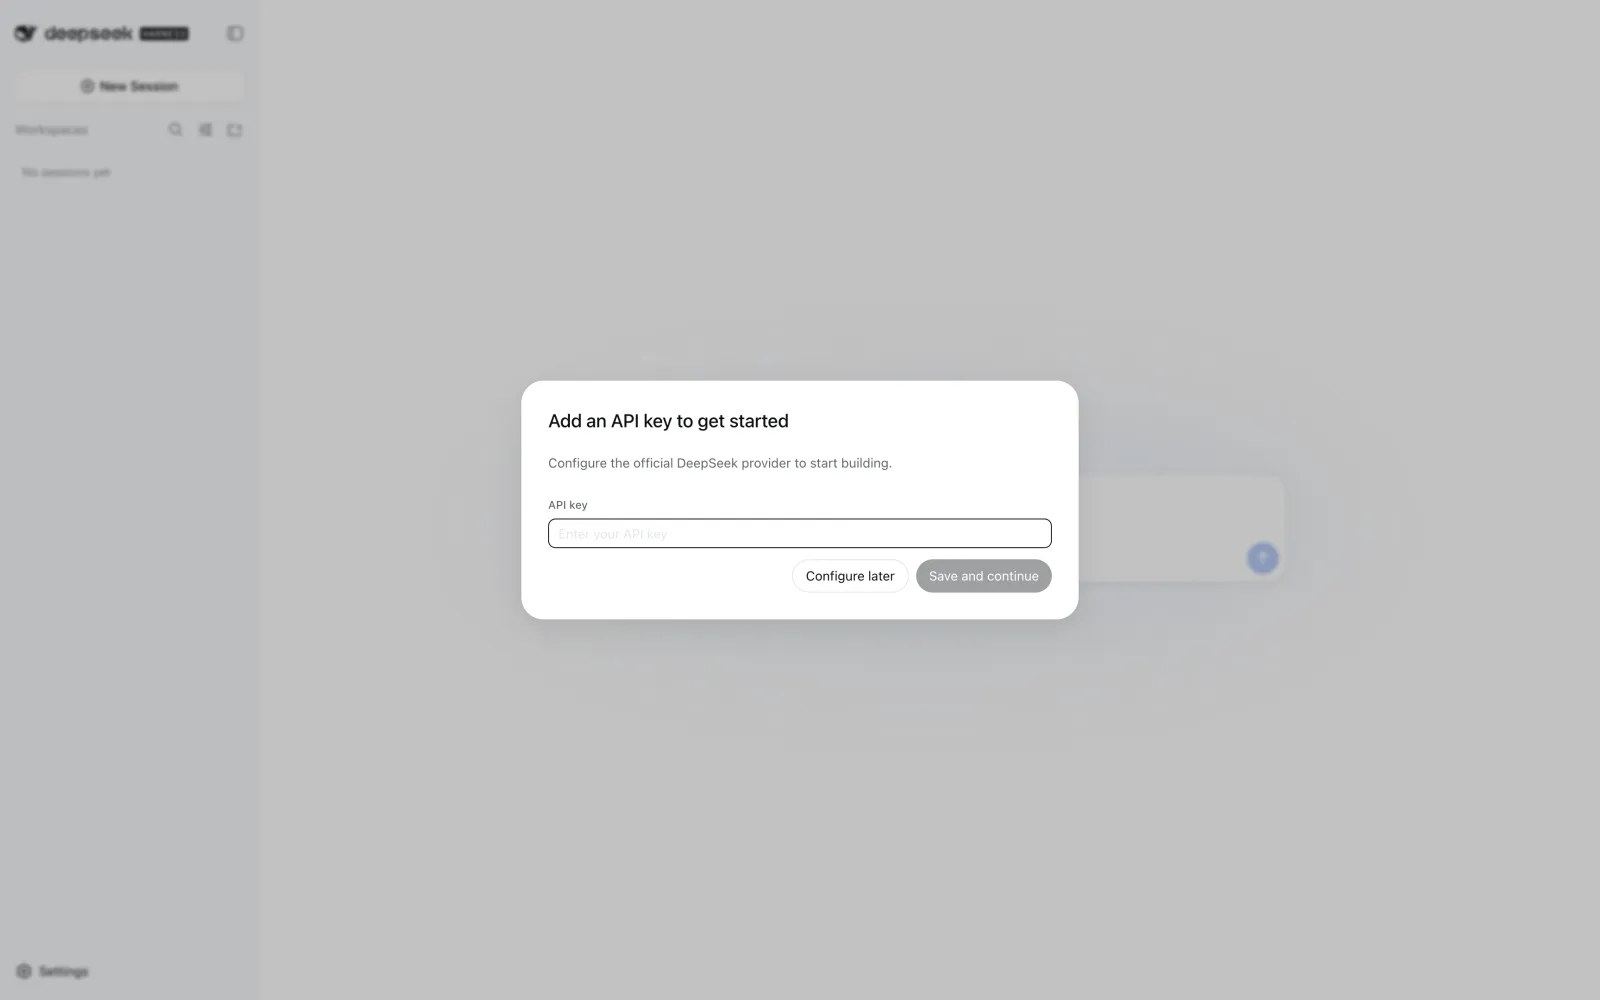
It will also ask you for a DeepSeek API key. That prompt is for DeepSeek's hosted service, and since we're using a local AI model, select Configure later.
Step 5: Add Atomic Chat as a custom provider
In DeepSeek Harness, open Settings, then Models. The default points to the hosted provider. To use your local model, select Add a custom provider.
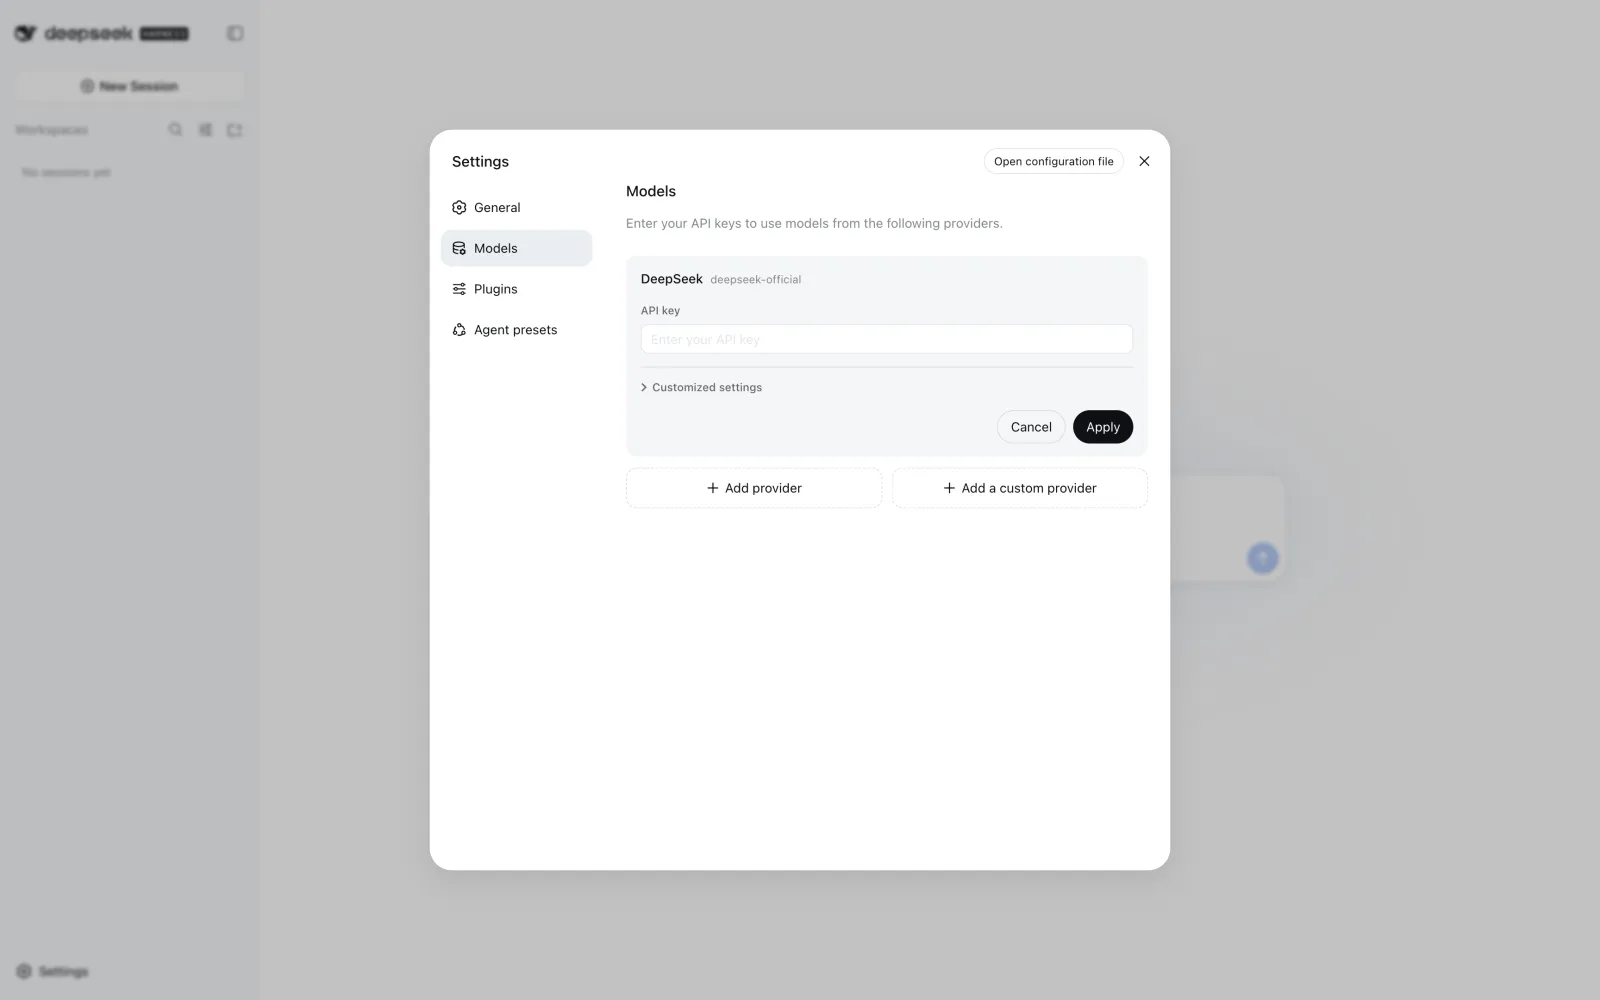
Enter the following values:
| Field | Value |
|---|---|
| Provider ID | atomic |
| Display name | Atomic Chat |
| Base URL | http://127.0.0.1:1337/v1 |
| API protocol | openai-completions |
| API key | The key set in Atomic Chat |
Keep the provider ID lowercase. The ID is permanent and also determines the credential name used by the Harness. For example, the provider ID atomic maps to ATOMIC_API_KEY.
The /v1 prefix must be part of the Base URL.
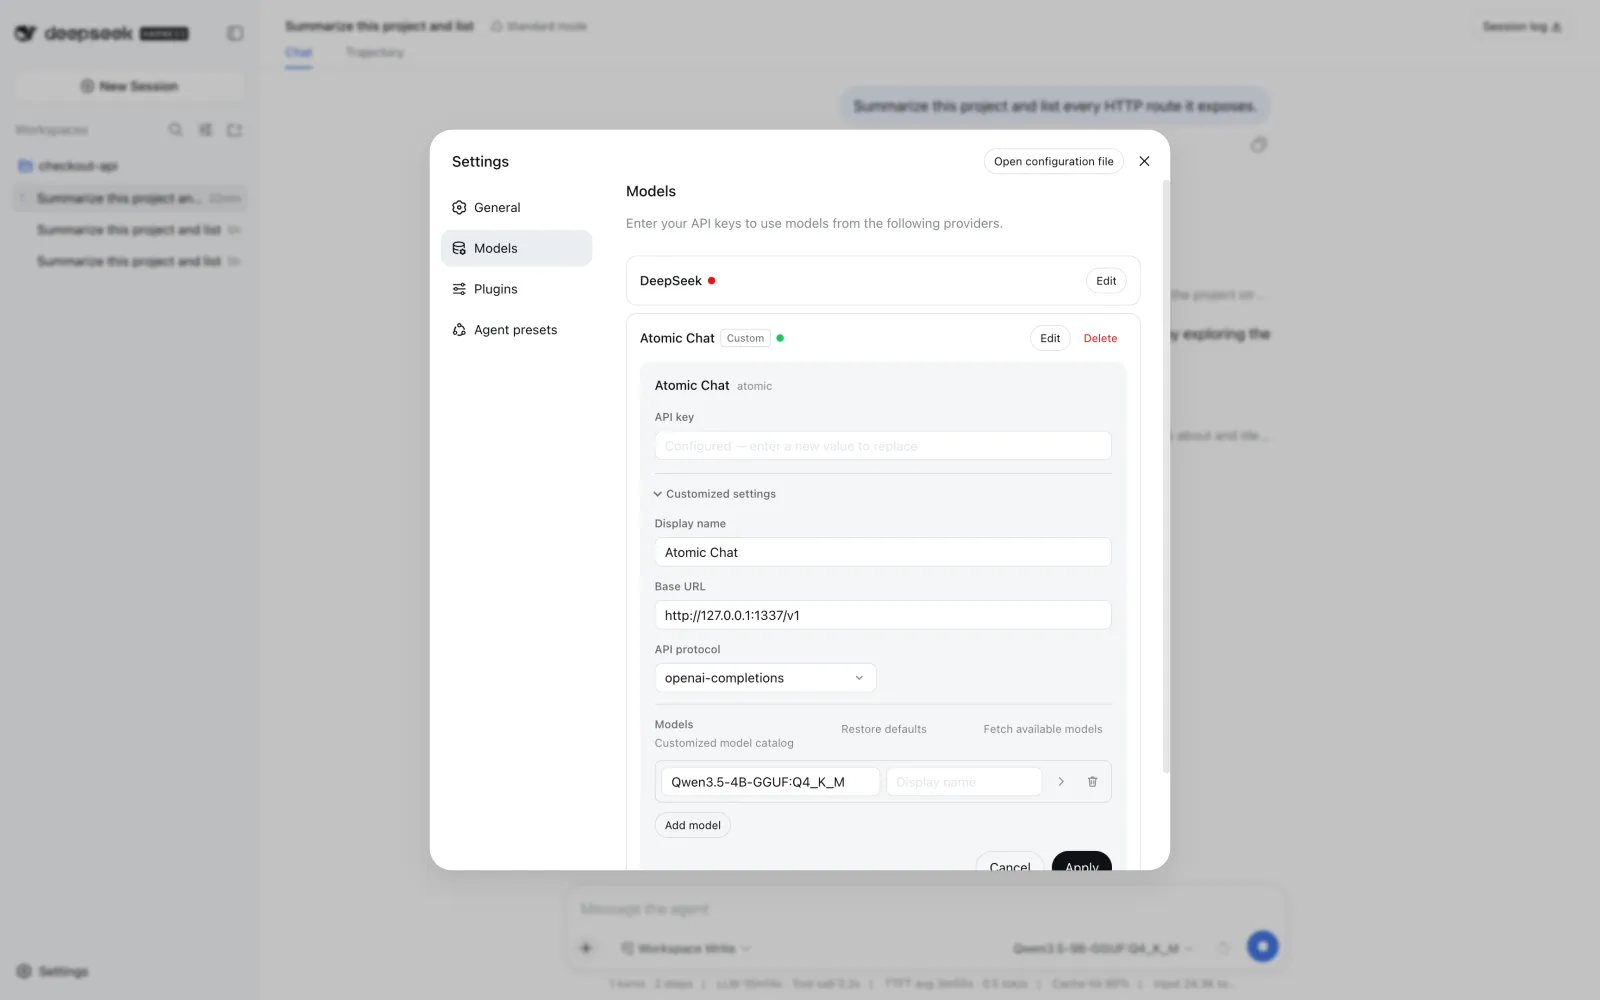
Select Fetch available models. The Harness will query the endpoint and list the model that Atomic Chat is currently serving. This single check confirms that:
- The local server is reachable.
- The Base URL includes the correct API prefix.
- The API key matches.
- Atomic Chat has a model loaded.
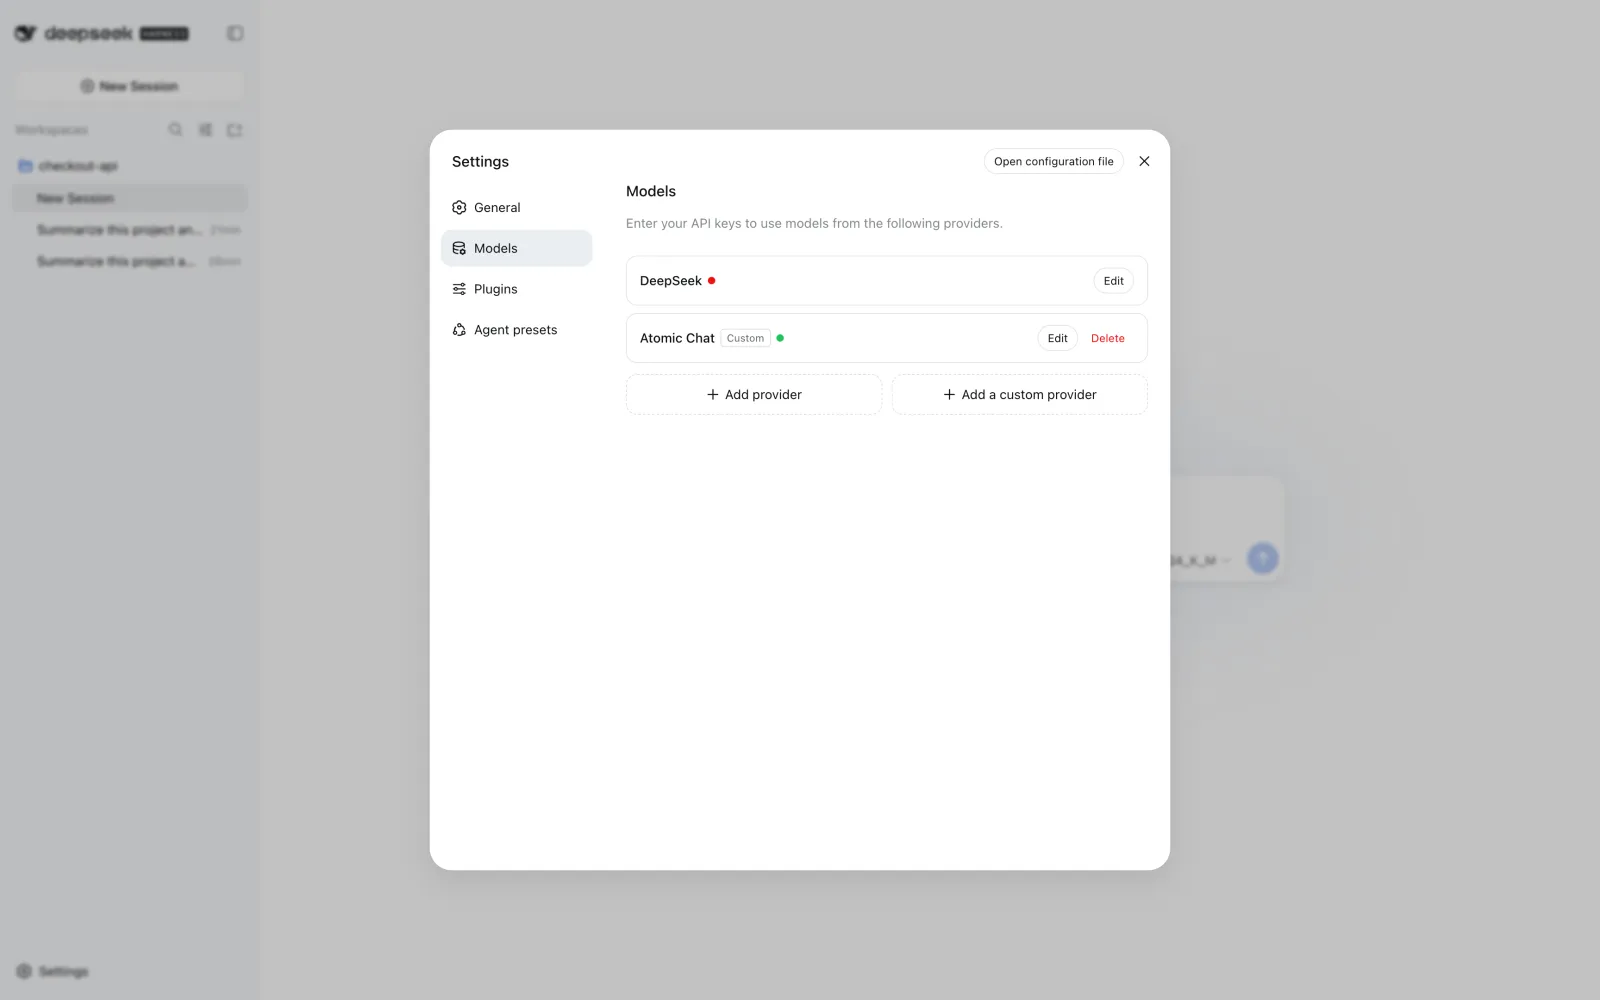
Save the provider. A green status dot means the credential resolves correctly; a red dot means it does not.
Step 6: Select the model and workspace
Return to the main Harness screen and open the model picker. Models are grouped by provider, so the local model will appear under Atomic Chat.
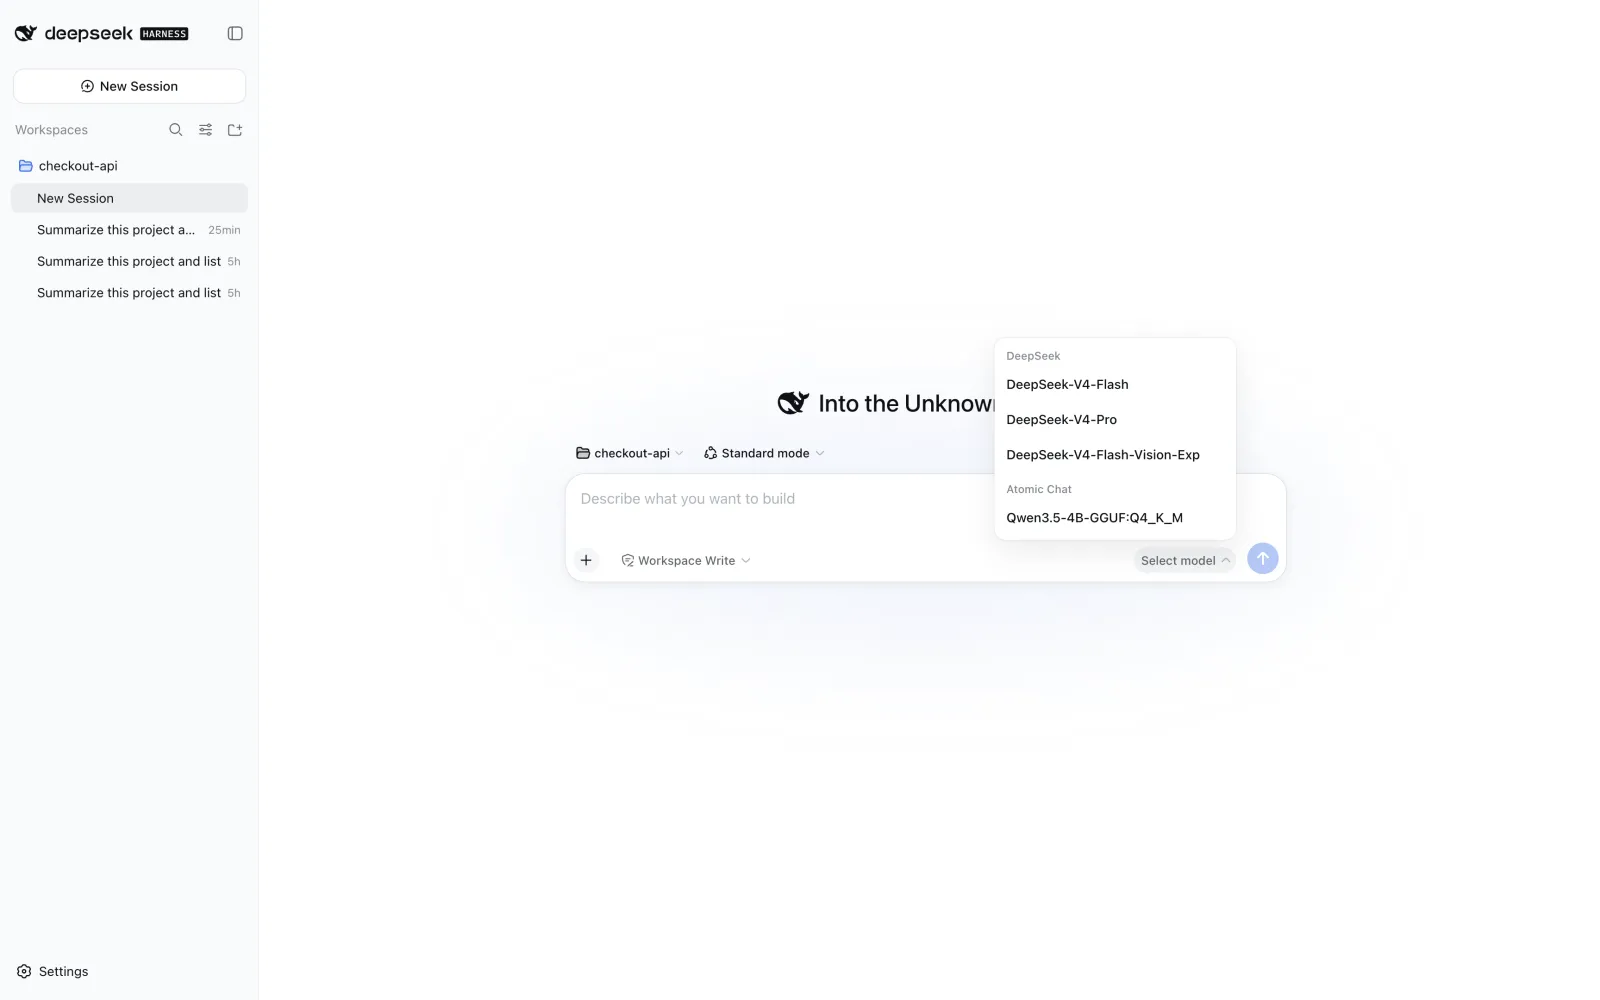
Select the model, then choose Choose workspace and add your project directory. The message composer remains disabled until a workspace is selected.
DeepSeek Harness stores this configuration in:
$DSH_HOME/settings.yaml
If DSH_HOME is not set, the default location is ~/.dsh/settings.yaml.
The route in settings.yaml contains the provider URL, protocol, and the name of the environment variable that holds the credential. It does not store the API key itself.
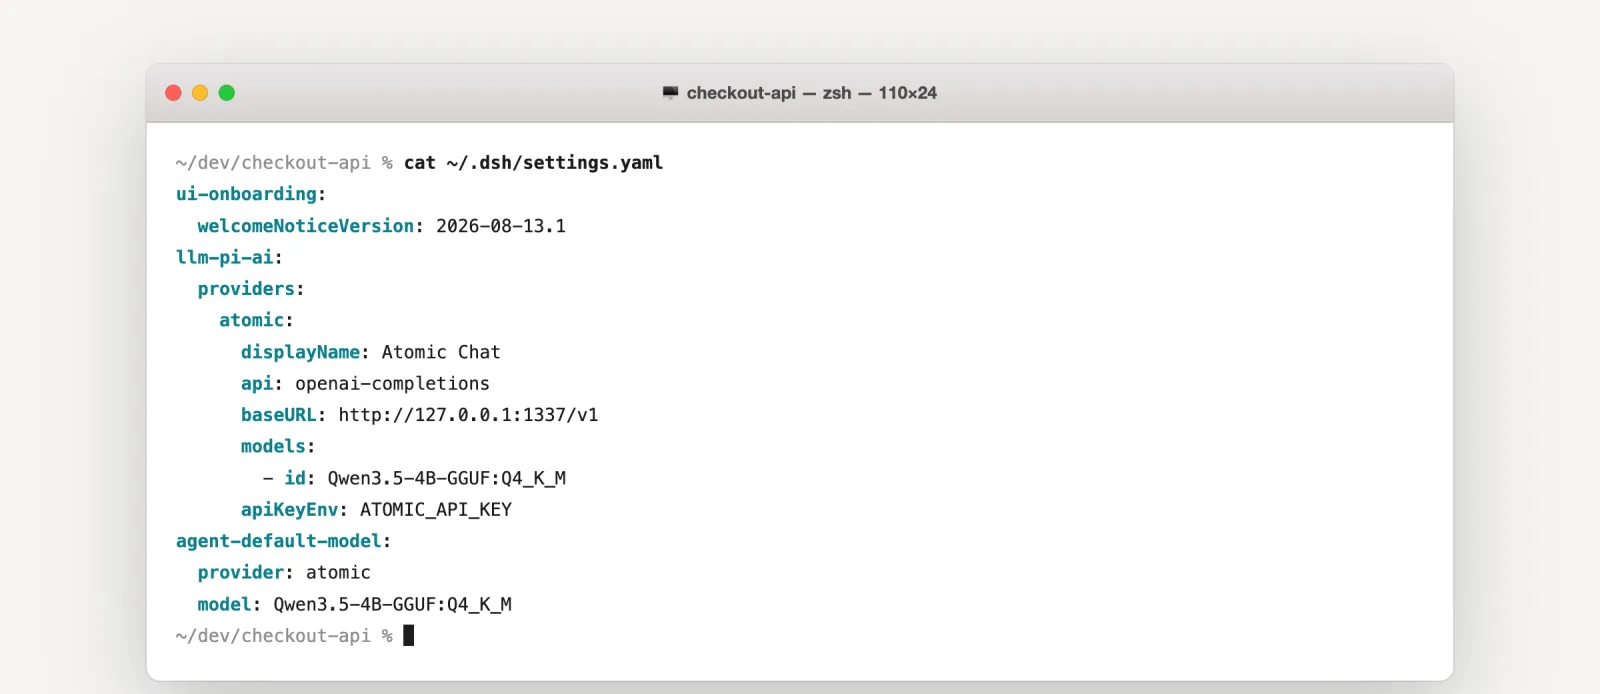
Atomic Chat's Run button writes the same configuration automatically. A provider created in the Harness interface and one configured by Atomic Chat are interchangeable as long as the provider ID, endpoint, model ID, and credential match.
Step 7: Run your first local agent task
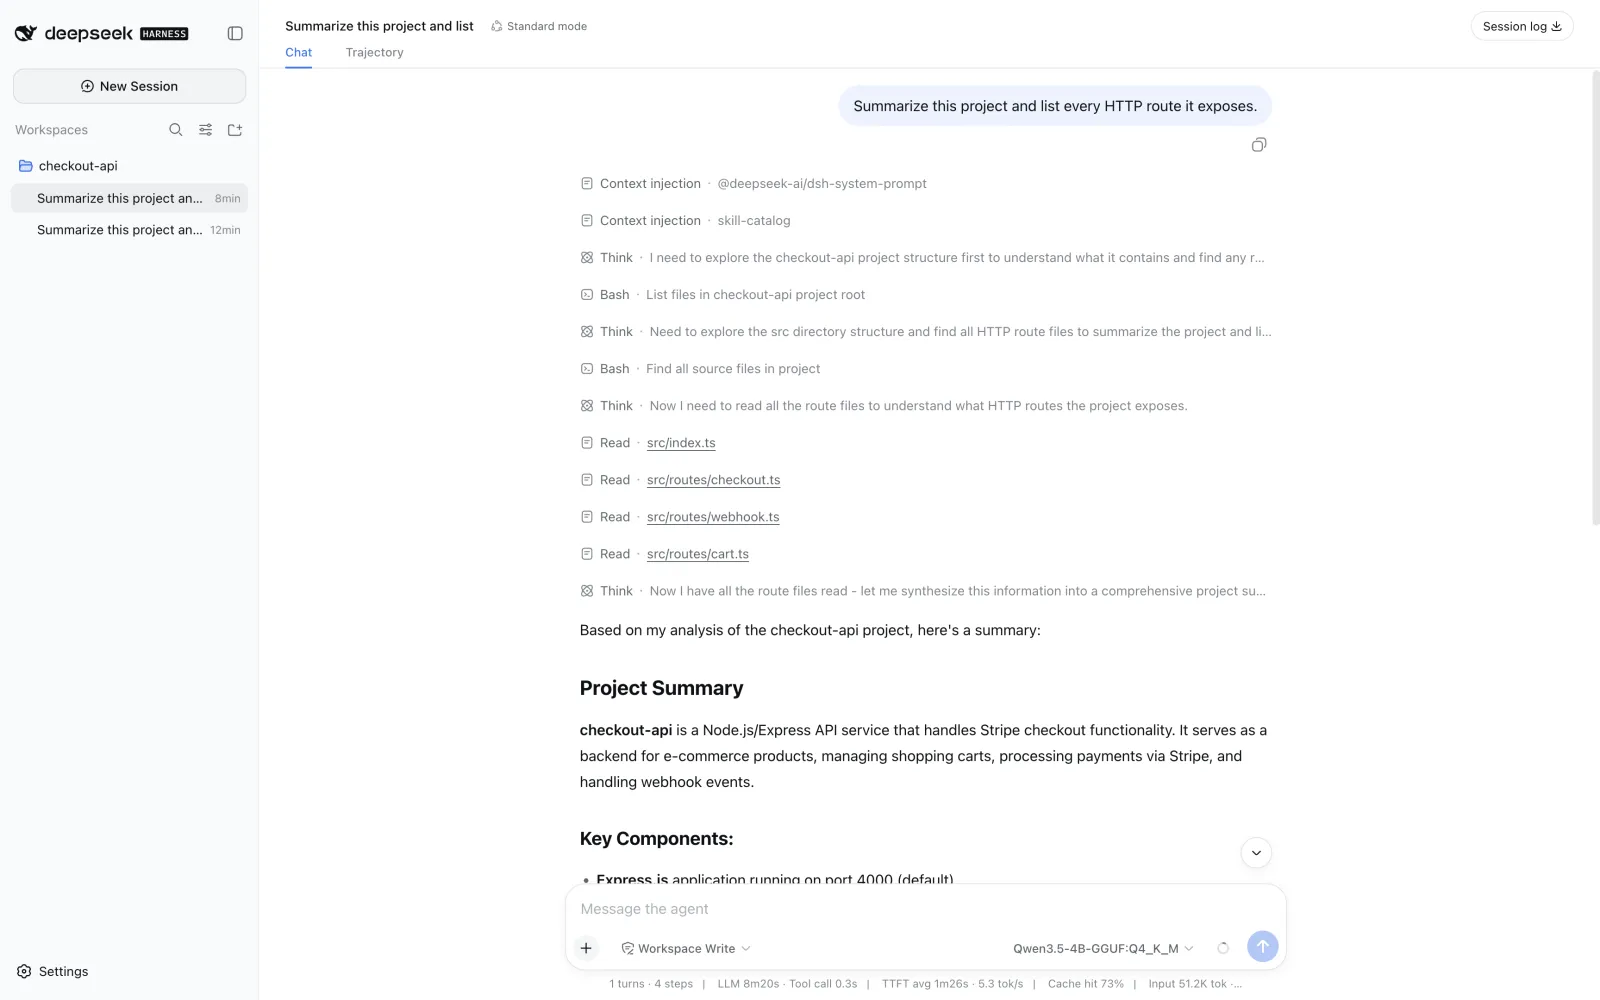
Let's check that it works with a simple prompt, for example:
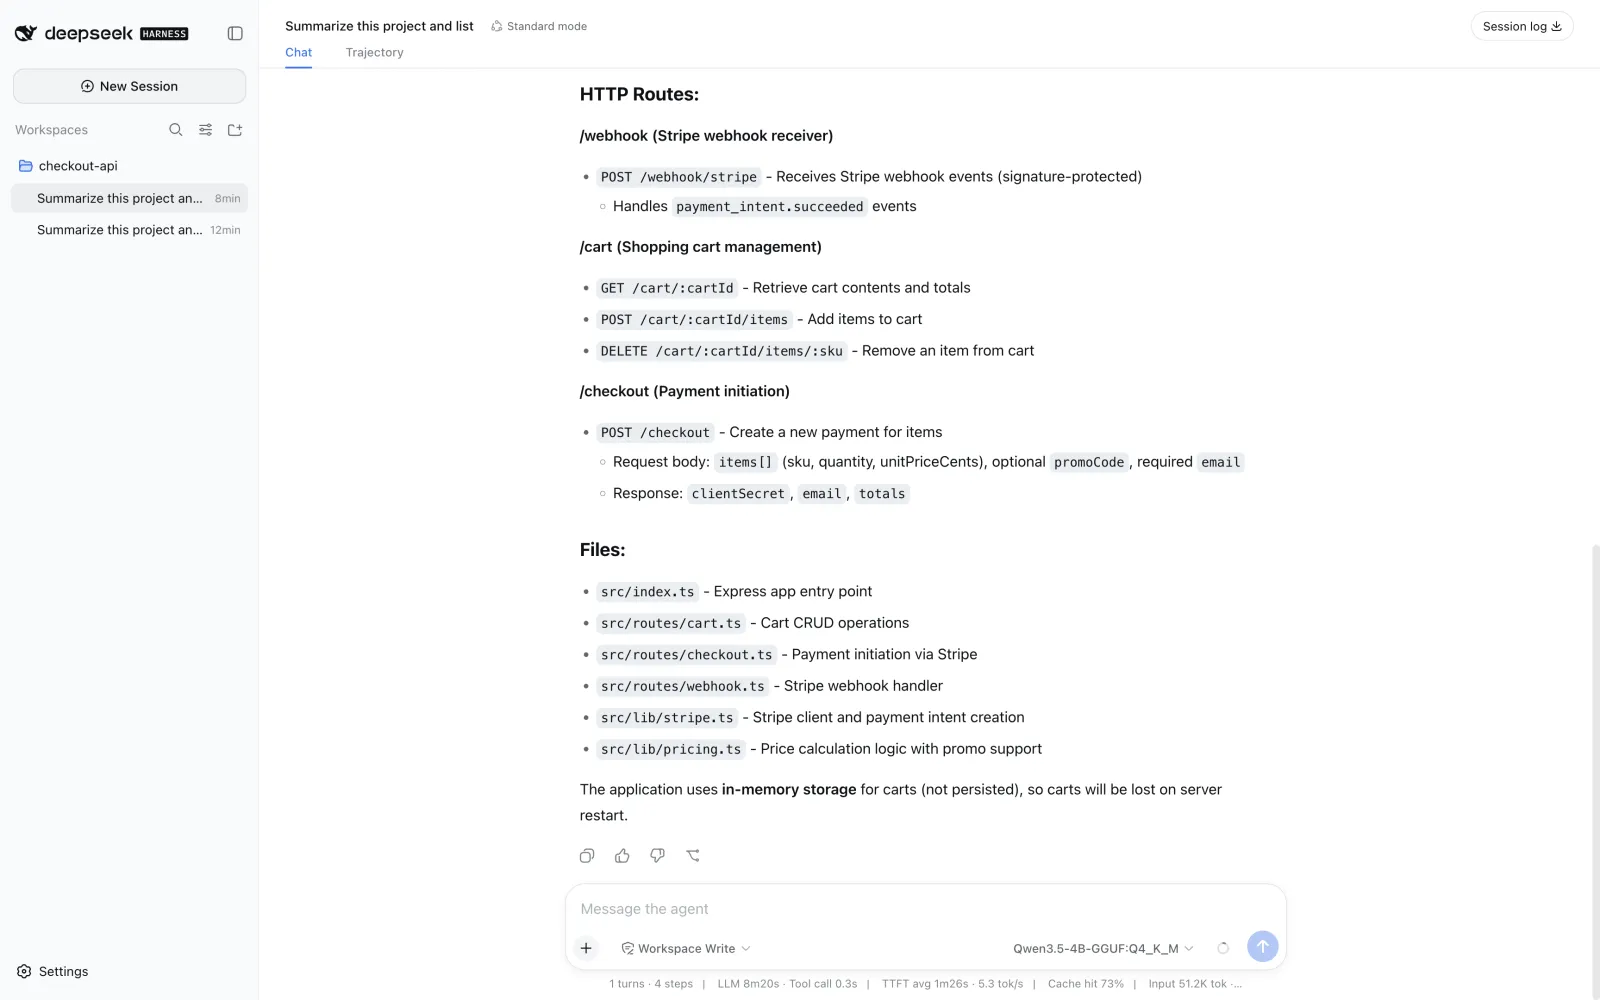
Summarize this project and list every HTTP route it exposes.
It will do some investigating:
And here's the result:
Or ask the AI to create a file:
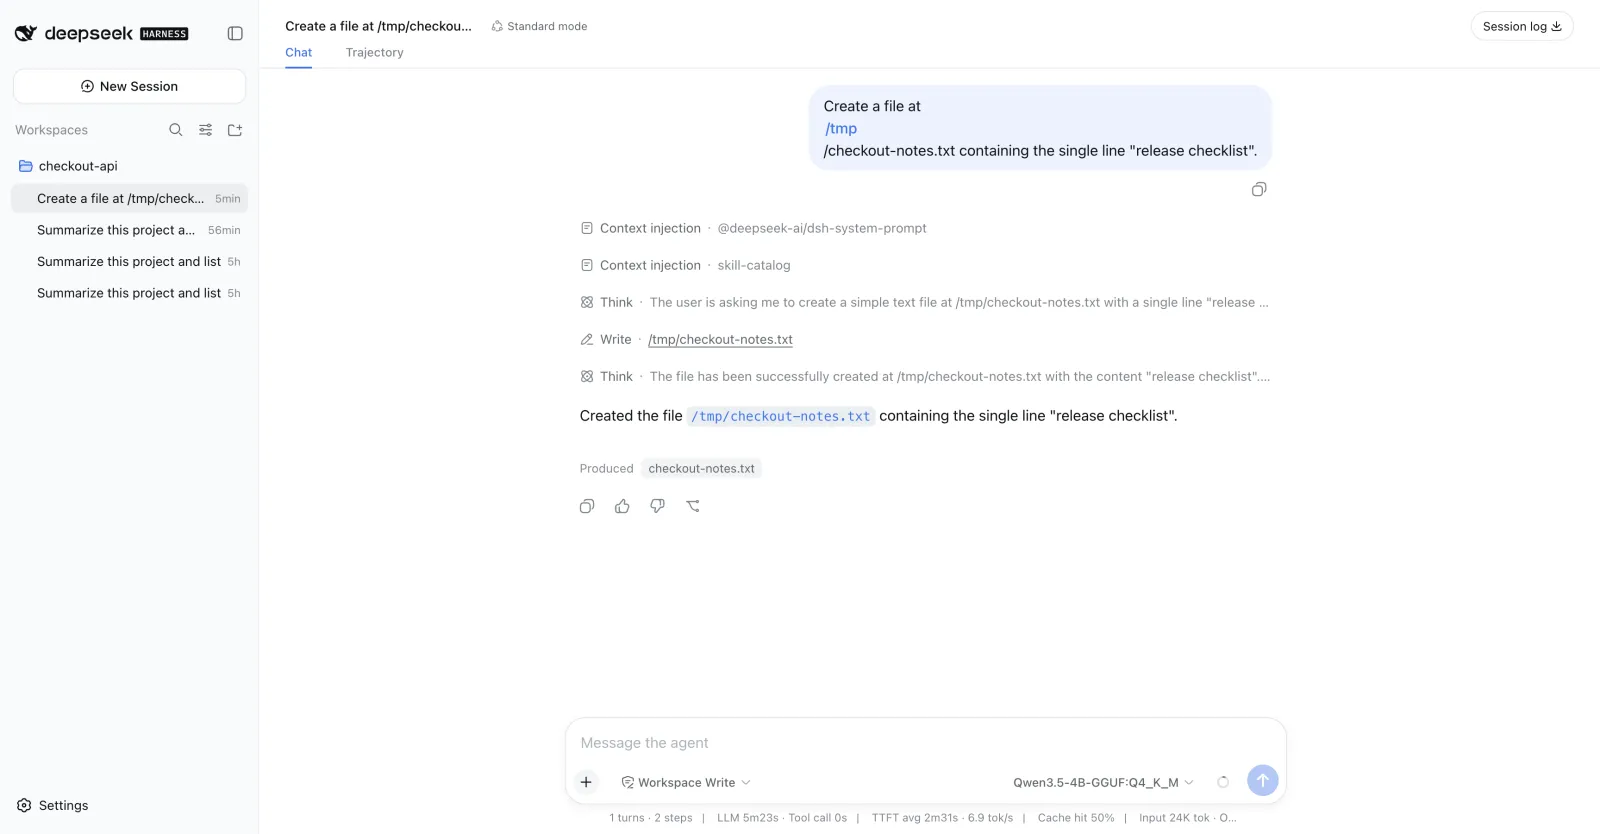
Configure permissions, plugins, and agent modes
The Harness also lets you control how much context and capability each session receives, which is super powerful.
Choose an agent preset
DeepSeek Harness includes Standard, PTC, Minimal, and Creator presets. Creator mode lets you draft a custom agent configuration.
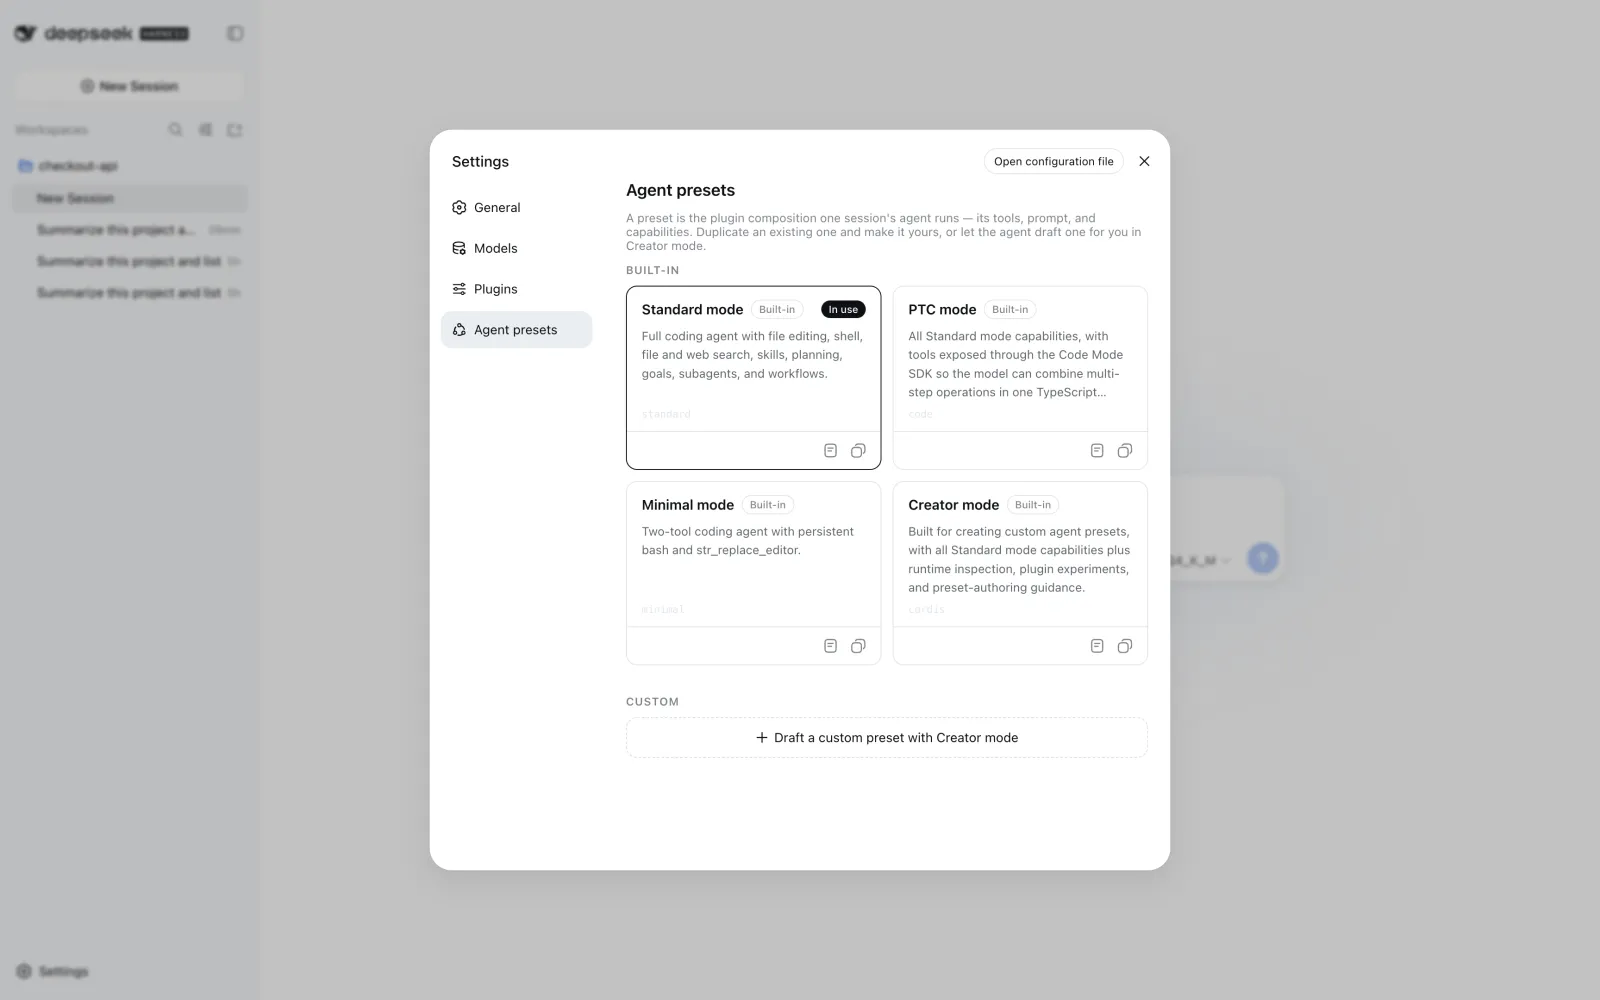
The preset selector is available when starting or configuring a session.
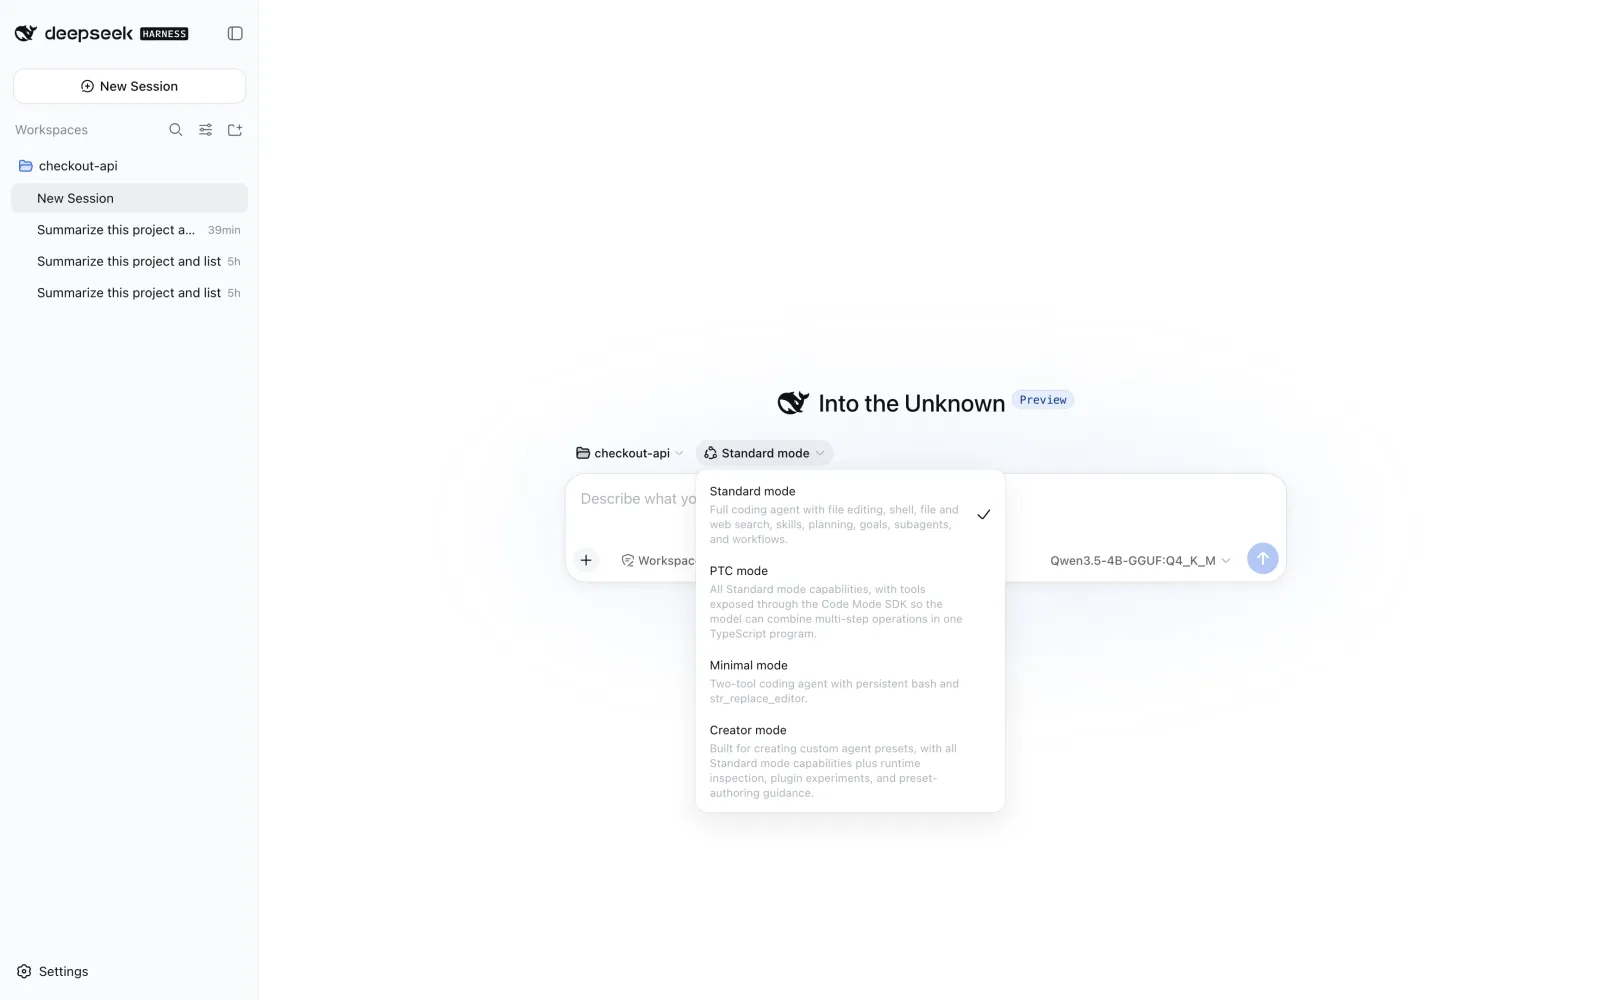
Standard mode gives the model a broad tool and skill catalog, but that comes with a large initial prompt. In our measurement, the Standard system prompt was approximately 11,900 tokens, and it's going to get cached on the first run, which can take a bit if you use a model that's taxing on your system. Later messages in the same session are going to be much faster because the runtime will reuse the prompt prefix — in our case it reached a 90% cache hit, so keep that in mind.
If first-turn latency is the main problem, try Minimal mode. It exposes only two tools and removes most of the catalog from the prompt.
Set the session access mode
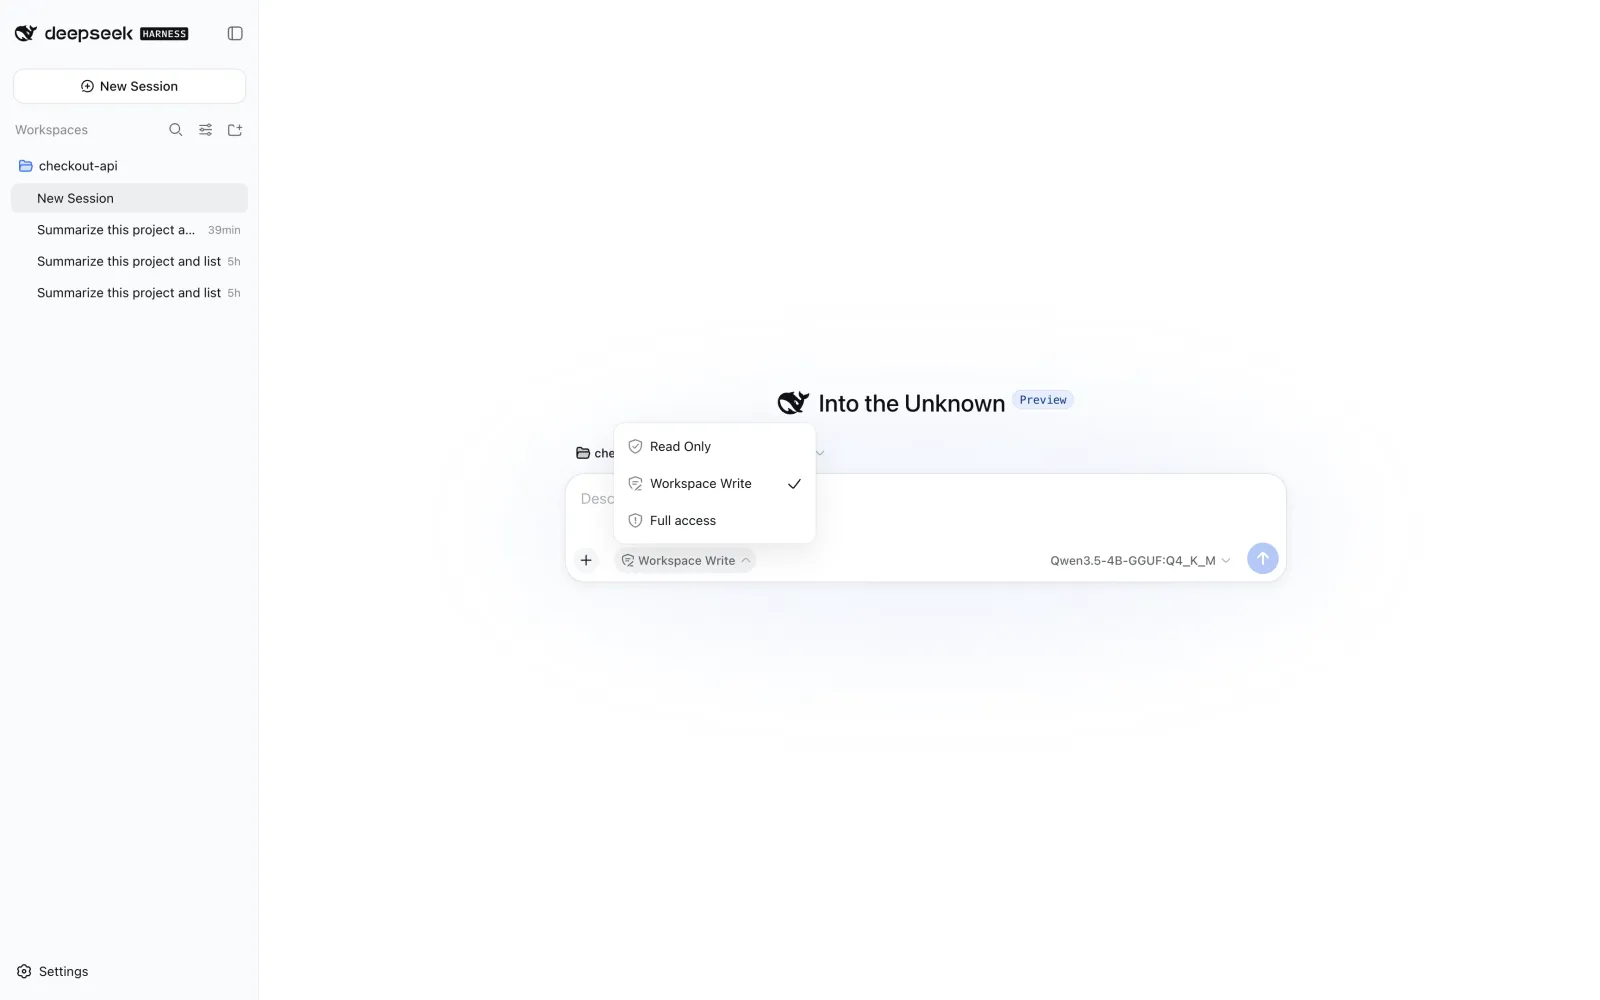
Each session can use one of three access modes:
- Read Only lets the agent inspect the workspace without changing it.
- Workspace Write allows changes inside the selected project.
- Full access gives the agent broader filesystem access.
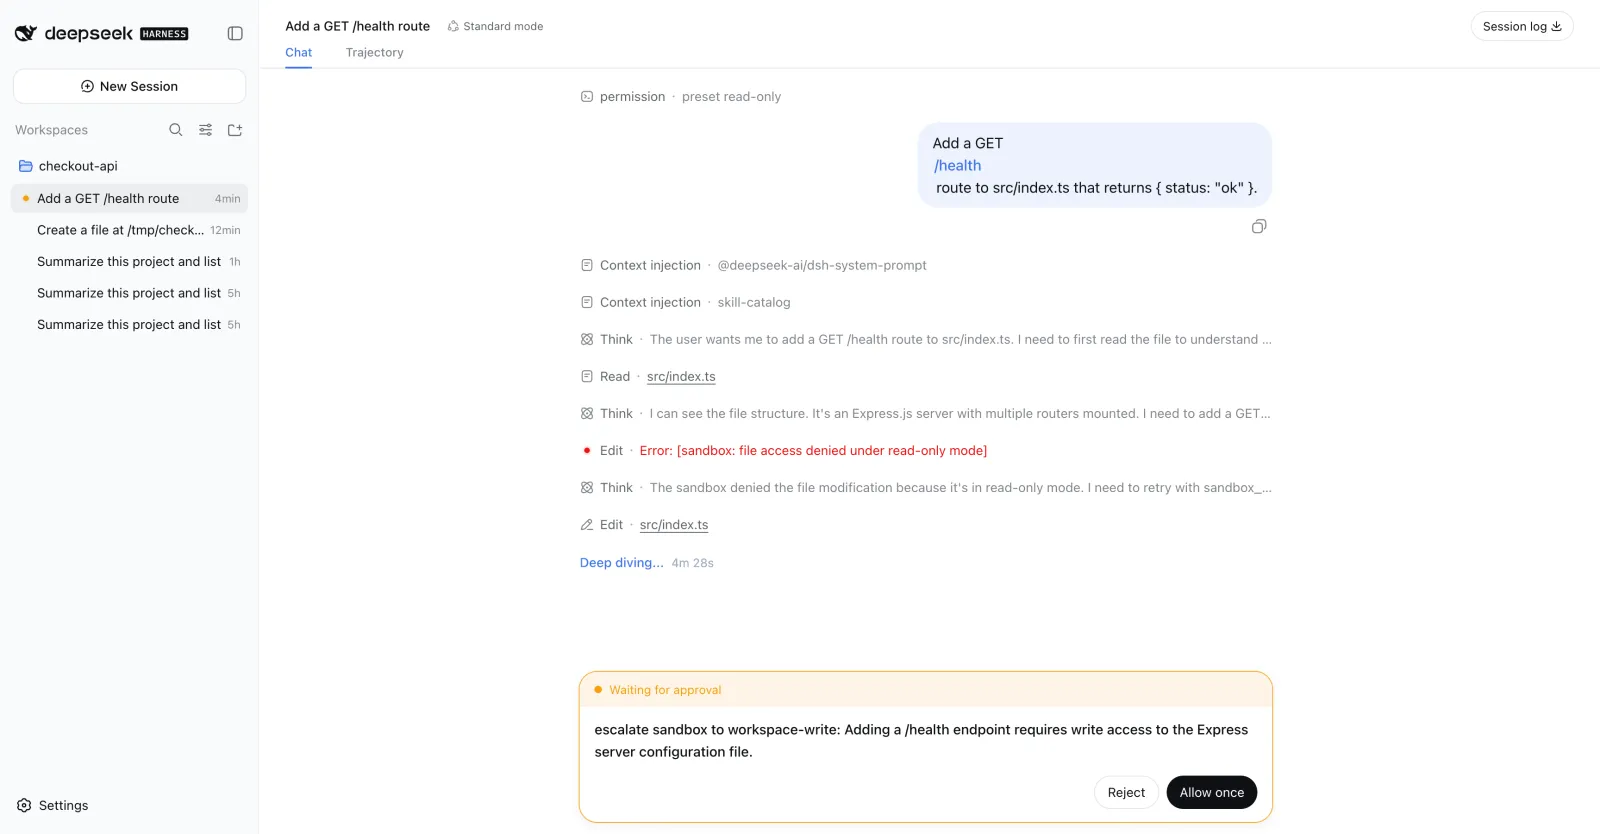
If a write is attempted under Read Only, the sandbox refuses it. The agent can read the error and request an escalation with a written justification, and the Harness then prompts you to either Reject or Allow once.
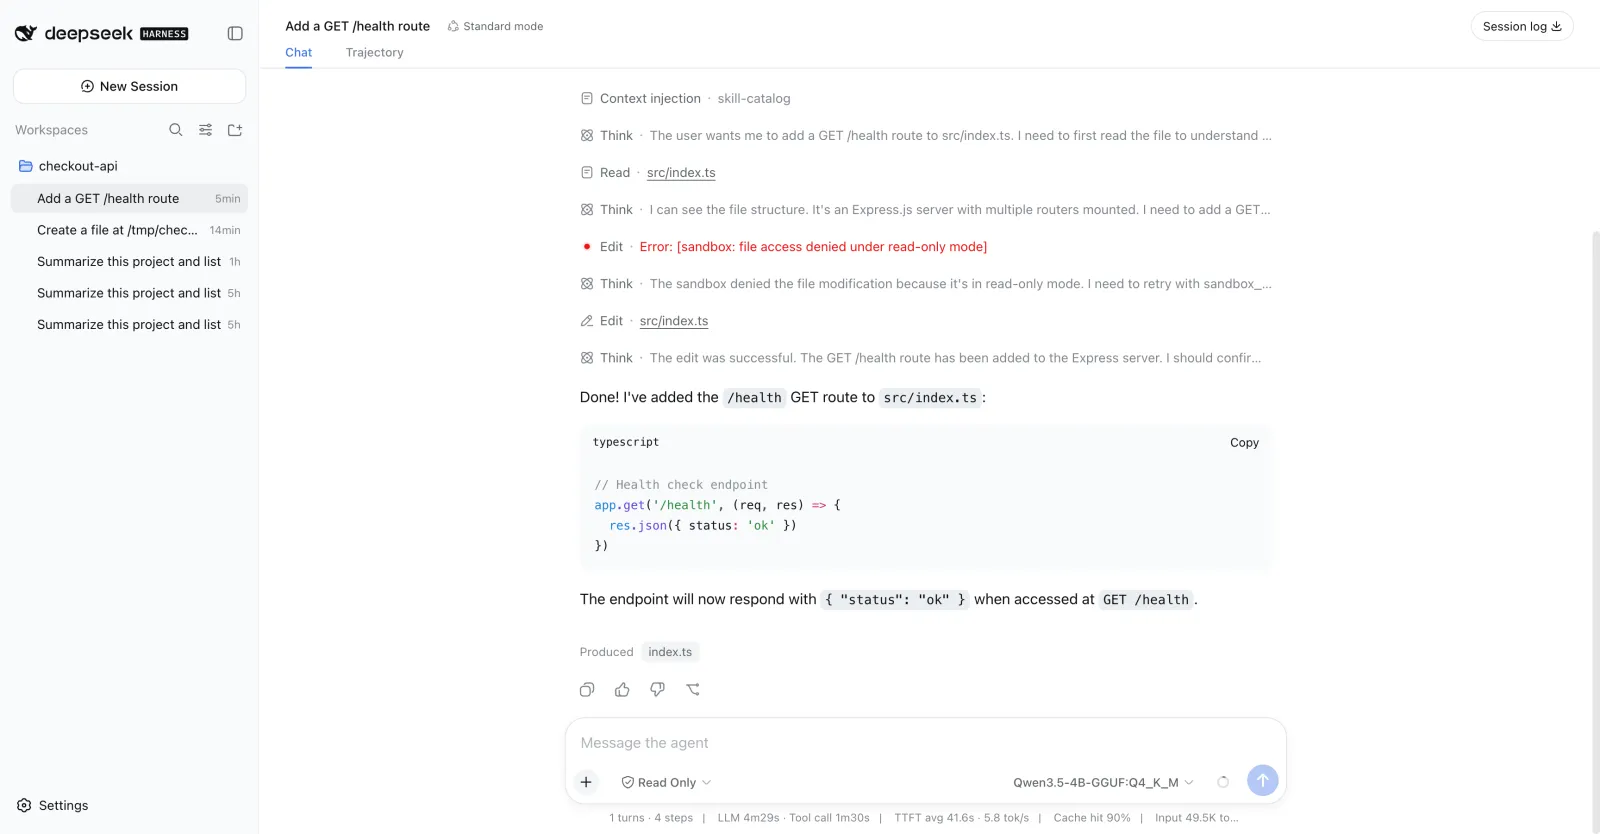
After one-time approval, the edit is applied and shown in the transcript.
Configure plugins
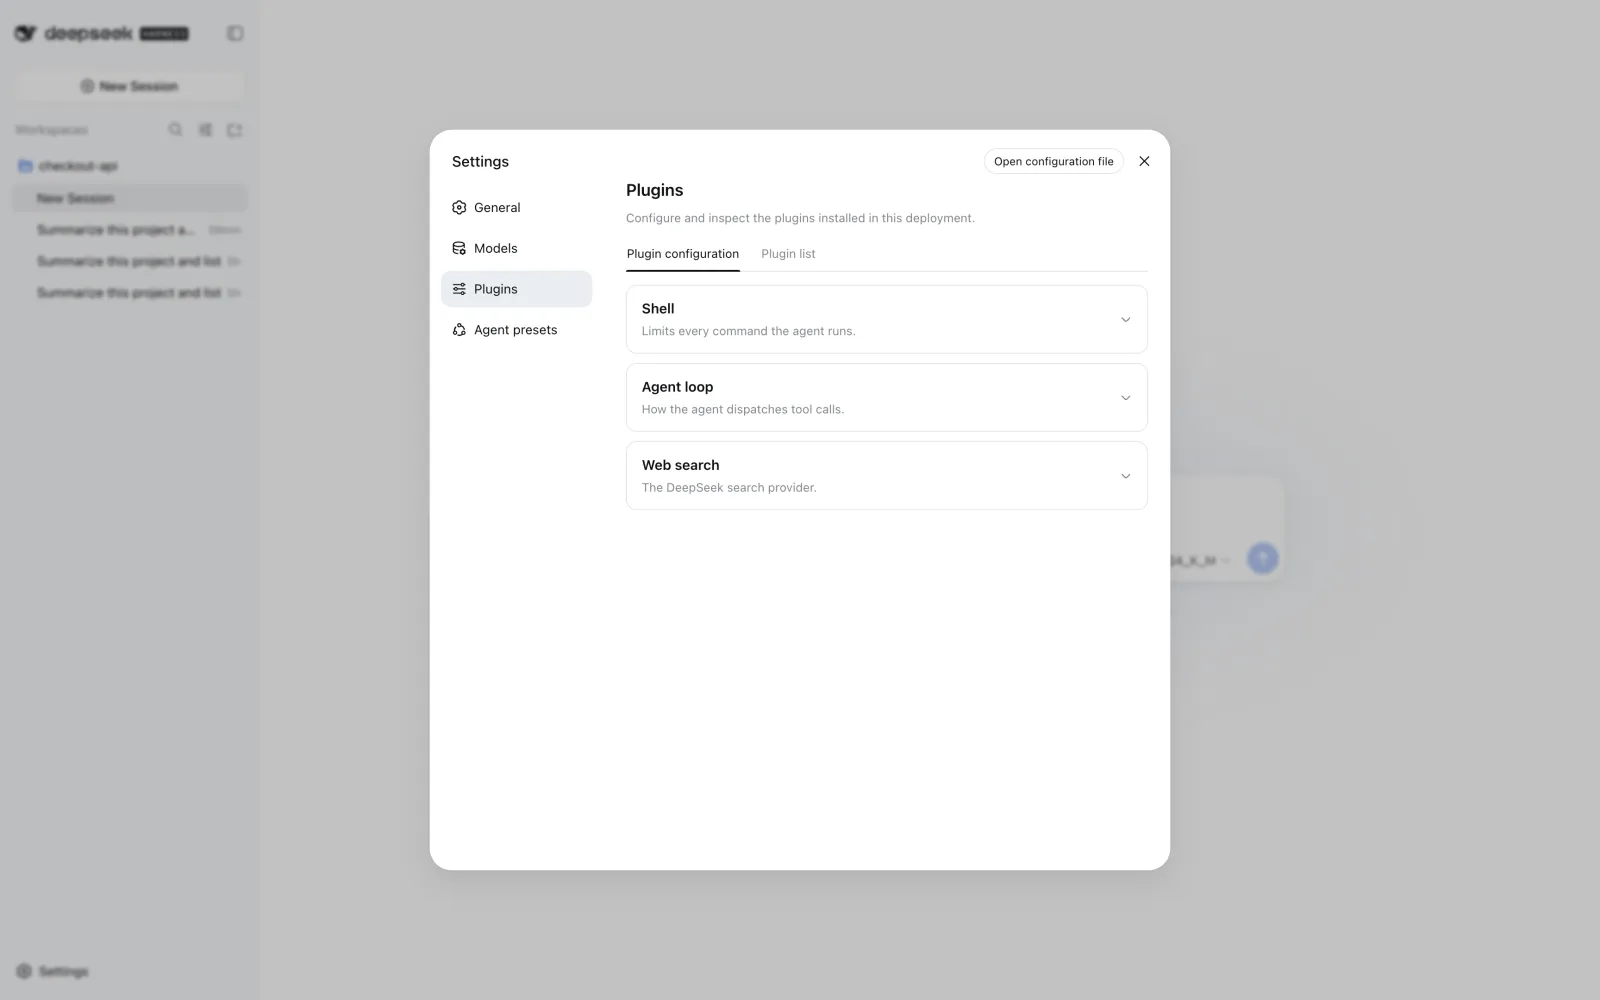
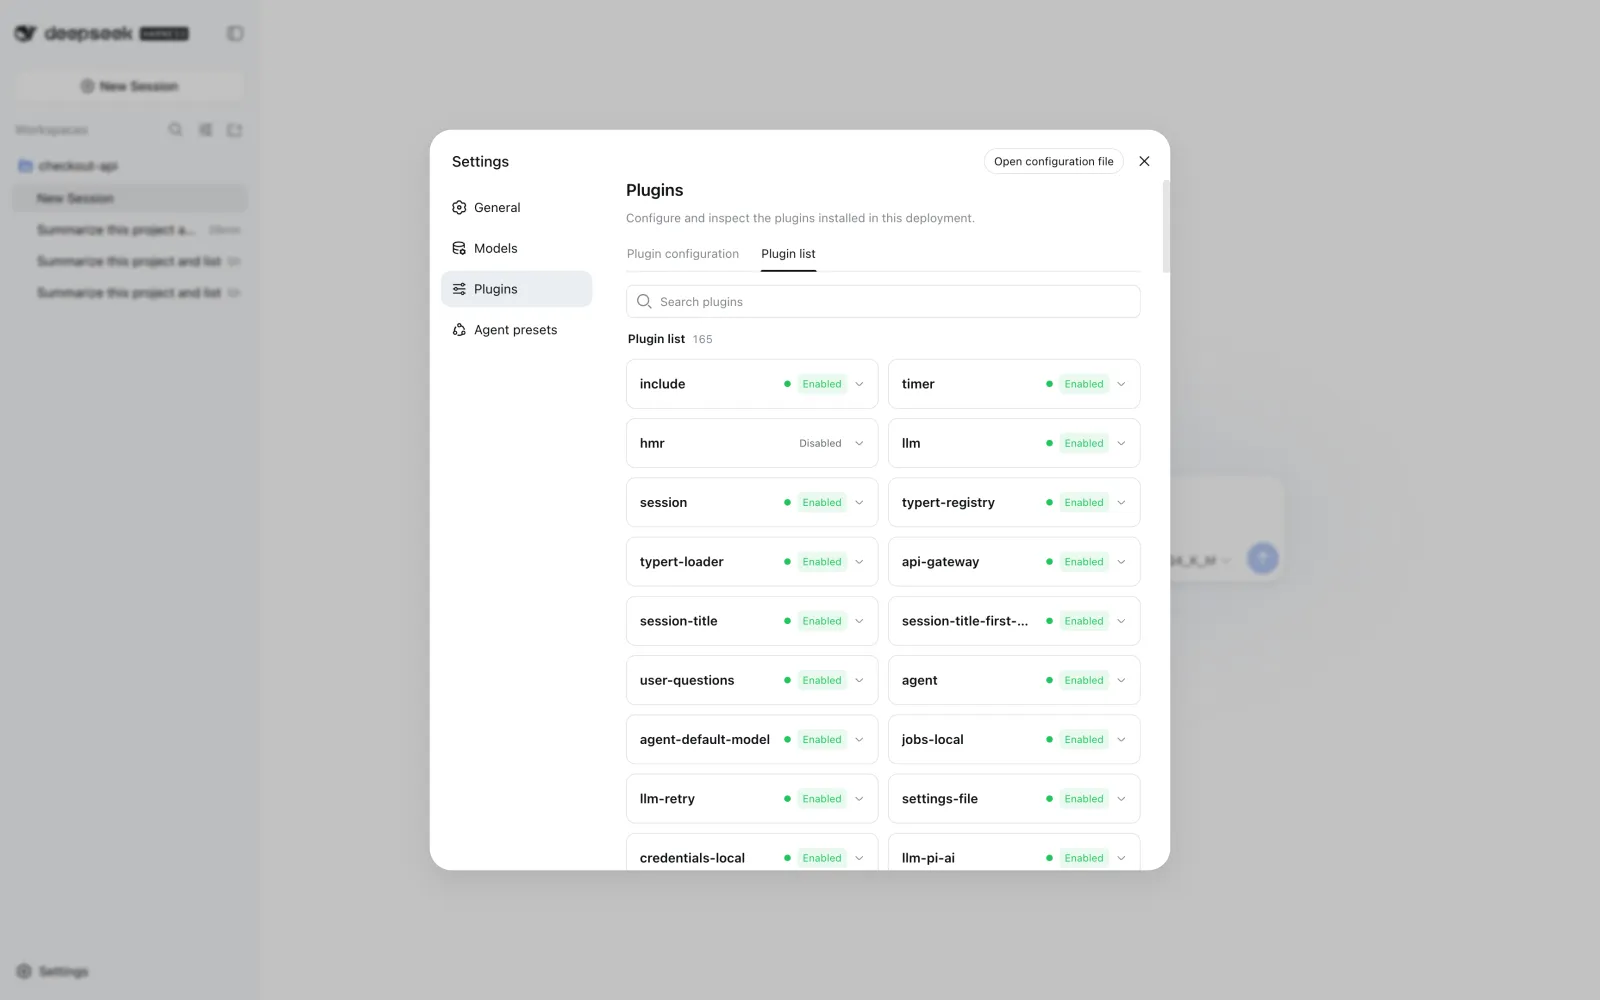
The main idea behind the Harness is that everything's a plugin. Our setup contained 165 entries out of the box, each of which could be enabled or disabled. Dedicated configuration tabs are available for Shell, the Agent loop, and Web search.
Here's how the plugin tree looks in DeepSeek Harness:
Disabling capabilities that a task does not need reduces the surface and the amount of instruction text the model must process, which improves performance.
Built-in commands
DeepSeek Harness also has useful commands you can run inside active sessions:
compactexportfeedbackgoalpermissionplanmodel
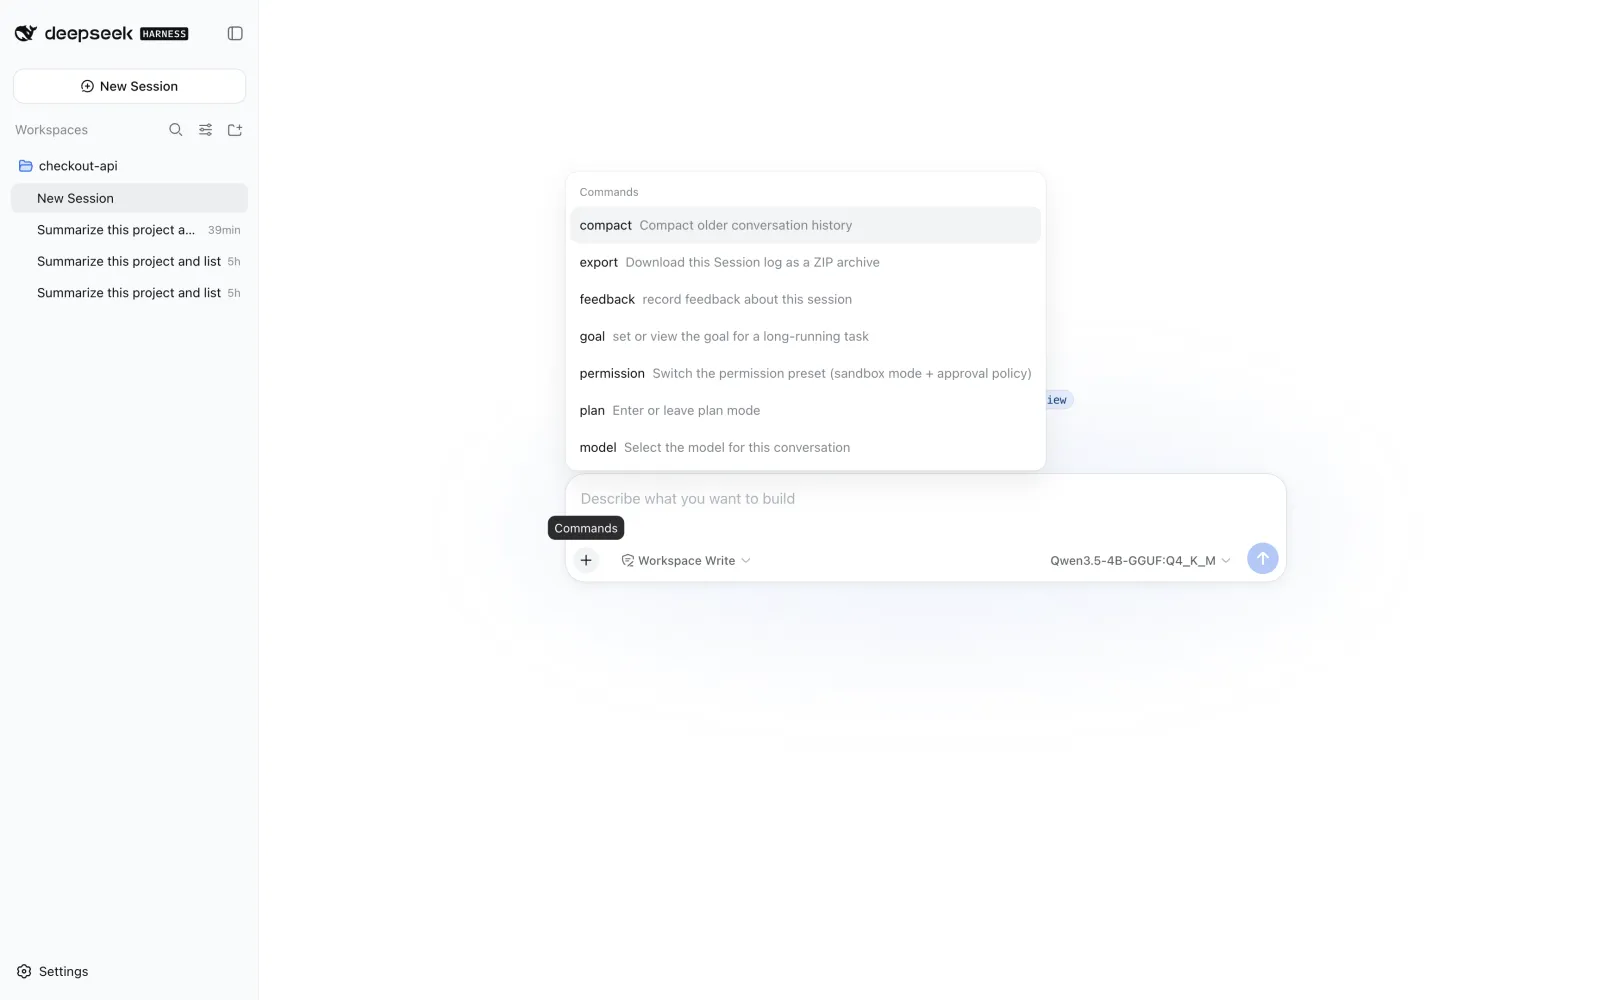
Use model to switch the active model, permission to change the access mode, and compact when a long session needs a smaller context.
How to fix potential setup errors
Here are the issues we encountered while running DeepSeek Harness with a local model, along with how to fix them.
"No API key for provider" on the first message
The provider saves without an API key, and the failure only appears when you send the first message:
This turn failed — No API key for provider: atomic
The error code is PI_AI_ERROR, which makes it look like a connection problem. It isn't. Atomic Chat ships with an empty API Key field, and DeepSeek Harness will not send requests to a route without a credential. Set a key in Server Configuration in Atomic Chat, then enter the same value in the custom provider in the Harness.
"Fetch available models" returns nothing or fails
If the fetch comes back empty, Atomic Chat has no model loaded. If it returns a 401, the API keys on the two sides don't match. If it can't connect at all, check that the Base URL ends with /v1 and that the port matches the one in Server Configuration.
The composer shows "Select model" and won't accept input
This happens after you change the model list on a provider. The Harness keeps the previous default in settings.yaml under agent-default-model, and if that model ID no longer exists, the composer blocks input until you pick a model again. Open the model picker and select the model currently served by Atomic Chat.
The agent is unusably slow, even on short answers
Check the model size against your free memory. On a 16 GB machine, a 9B model at a 4-bit quant did not stay resident once the context cache was added — part of the weights paged to disk and generation dropped to roughly 0.3 tokens per second, which made a single agent step take minutes. The same task on a 4B model at the same quant ran end to end with four tool calls. The practical ceiling is lower than the file size suggests, because the agent's context competes for the same memory.
If only the first reply of a session is slow, that's the system prompt being processed and cached — see the agent preset section above.
npx appears to hang on the first run
The package pulls roughly sixty scoped dependencies and prints nothing while it resolves them. On a first run this can take several minutes before the local URL appears. It isn't stuck.
Frequently Asked Questions
A few common questions about DeepSeek Harness and running it against a local model.
What is DeepSeek Harness?
DeepSeek Harness, or dsh, is an open-source agent harness developed by DeepSeek AI. It connects an AI model to tools, files, shell commands, sessions, sandboxes, storage, and other capabilities that let the model act as an agent.
DeepSeek builds Harness around the Cordis plugin system. Models, tools, skills, agent loops, storage, scheduling, and the user interface can all run as replaceable plugins.
Is DeepSeek Harness an AI model?
No. DeepSeek Harness is agent software, not a language model. It provides the runtime and tools that let a compatible model inspect files, execute commands, edit code, search information, and complete multi-step tasks.
The model supplies the language and reasoning capabilities. Harness controls how the model interacts with the surrounding environment.
Does DeepSeek Harness run the model itself?
No. DeepSeek Harness connects to a model provider that performs inference. A hosted API can provide the model, or software such as Atomic Chat can run the model locally and expose it through an OpenAI-compatible API.
In this setup, Atomic Chat loads the model and handles inference while DeepSeek Harness manages the agent loop and tools.
Is DeepSeek Harness free?
Yes. DeepSeek Harness is open-source software released under the MIT License. You do not need to pay a subscription fee to use the Harness itself.
Model costs depend on the provider you configure. A hosted API may charge for tokens, while a locally hosted model can run without per-token API fees.
Can DeepSeek Harness run local AI models?
Yes. DeepSeek Harness can use local models through a compatible model provider or API endpoint. The model server must expose an interface that Harness can use, and the selected model must support the capabilities required by the agent.
For this setup, Atomic Chat provides the model runtime and an OpenAI-compatible API.
How do I connect DeepSeek Harness to Atomic Chat?
Configure a custom model provider in DeepSeek Harness with:
- Base URL:
http://127.0.0.1:1337/v1 - Protocol:
openai-completions - API key: the same value configured in Atomic Chat
Then select the local model exposed by Atomic Chat.
Does a local model need tool-call support?
Yes. Choose a model that explicitly supports tool calling. DeepSeek Harness depends on structured tool requests to inspect files, execute commands, search projects, and perform other agent actions.
A model that only produces normal text may answer questions correctly but still fail to operate Harness tools reliably.
Can DeepSeek Harness work completely offline?
Yes, with limits. The core local workflow can run without an internet connection after you download DeepSeek Harness, its dependencies, Atomic Chat, and the model files.
Features that contact external services still need internet access. These include web search, remote MCP servers, online model APIs, package registries, and web-connected plugins.
Does DeepSeek Harness send my code or repository to DeepSeek?
DeepSeek Harness stores prompts, model output, tool records, file paths, and runtime data locally by default, according to DeepSeek's data-processing documentation. When the model endpoint points to 127.0.0.1, local model inference also stays on the computer.
External model providers, web tools, MCP servers, and plugins can send data to their respective services. DeepSeek also states that Harness may report anonymized configuration information and project lists for troubleshooting and product improvement; users can disable or redirect that reporting.
Where does DeepSeek Harness store its settings?
DeepSeek Harness stores its default configuration at ~/.dsh/settings.yaml.
If you set a custom Harness home through DSH_HOME, it uses $DSH_HOME/settings.yaml.
Harness can reference API secrets through environment-variable names instead of storing the secret values directly in the YAML configuration.
How do I install DeepSeek Harness?
Install Node.js, then start the official Web UI with npx @deepseek-ai/dsh web.
By default, Harness serves the local Web UI at http://127.0.0.1:3080. Developers can also clone the official GitHub repository and build Harness from source.
Does DeepSeek Harness work on Windows?
Yes, although some runtime features and third-party integrations can differ by operating system. The main Web UI and CLI have a Windows execution path, while some development components may target Linux or macOS more directly.
Check the current release documentation before relying on platform-specific shell, sandbox, PTY, or plugin behavior.
How is DeepSeek Harness different from Claude Code or Codex?
DeepSeek Harness focuses on composability and model independence. It exposes models, tools, skills, storage, sandboxes, sessions, agent loops, and even the interface through its plugin architecture.
Claude Code and Codex provide more opinionated coding-agent products with their own supported workflows. The products overlap in tasks such as repository inspection, code editing, shell use, and delegated agent work, but they use different runtime and extension architectures.
Key takeaways
- DeepSeek Harness is DeepSeek’s open-source framework for turning an AI model into a working agent. Its main design idea is that everything is a plugin — you can swap or combine models, tools, storage, interfaces, and agent behaviors on the fly.
- DeepSeek Harness can connect to a local model through any compatible provider. Atomic Chat can provide the model runtime and expose an OpenAI-compatible API.
- Configure the local provider to use
http://127.0.0.1:1337/v1, select theopenai-completionsprotocol, and enter the same API key used by Atomic Chat. - Use a model that explicitly supports tool calling. Text-only models generally cannot operate Harness tools reliably.
- After downloading the application, required packages, and model files, the main workflow can run locally without hosted-model API fees or a continuous internet connection.